« Posts under Modeling/Sculpting

[R&D] Maya Wine Cart – Modeling Progress

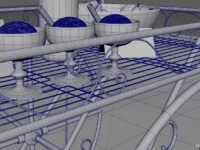
I’ve started a new piece to ring in the new year and with it comes some fun stuff to learn. I was searching for a nice scene to model when I came across a shot (bottom of post) on Pinterest courtesy of https://ruffledblog.com/ (https://ruffledblog NULL.com/). Below are shots of the first modeling pass. When putting a scene together I like to follow the order of: model, light, texture, render. I’ve roughed in several of the models so far and have one of the two types of flowers complete. Everything in the scene is pretty straight forward with the flowers and vines taking up the bulk of the time. The filigred steel around the cart was done by drawing out CV curves and then extruding a nurbs circle along their path. After the extrusion is complete I convert the nurbs tube to a polygon and then model a cap on each end.
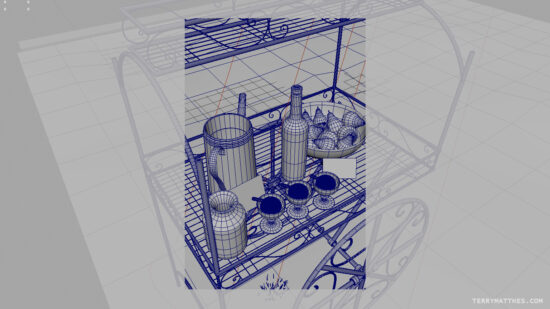
WineCartModelShotA (http://www NULL.terrymatthes NULL.com/wp-content/uploads/2018/01/WineCartModelShotA NULL.jpg)

The icecream was an interesting surface to try and capture. I ended up stumbling on a technique by Andre Caputo (https://www NULL.youtube NULL.com/watch?v=5hqBqzncVdw&t=48s) on Youtube for Modo. There is nothing special about the tools used to achieve the final goal so I was able to copy the technique in ZBrush. I’m not entirely happy with my results on the first pass so I will do another when time permits.
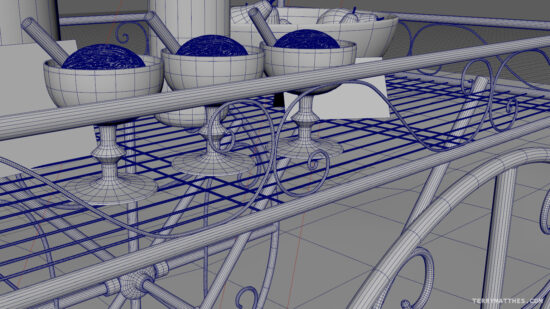
WineCartModelShotD (http://www NULL.terrymatthes NULL.com/wp-content/uploads/2018/01/WineCartModelShotD NULL.jpg)

The scene I chose has grass covering the ground and I’ve honestly never scattered objects in Maya. To achieve the scattering of the grass across the shot I used Maya’s system MASH (https://knowledge NULL.autodesk NULL.com/support/maya/learn-explore/caas/CloudHelp/cloudhelp/2016/ENU/Maya/files/GUID-5F45C398-D87D-424E-9F00-51D9FAB5A40B-htm NULL.html). I was really impressed by how fast and easy it was to get things up and running. I modeled a single patch of grass and then wrote some simple expressions in MASH to vary the size and positioning. I know as soon as a lot of you read “expression” you freak out and think “this is beyond me”. It’s not! A friend of mine pointed me to a simple primer and within 30 minutes I had things up and running. If you want the full rundown of MASH (of course you do) check out this tutorial (https://www NULL.youtube NULL.com/watch?v=6a7303eCTHI). It’s long, but thorough. For my purposes the grass I created should be a little lower poly, but as a first pass it will do.
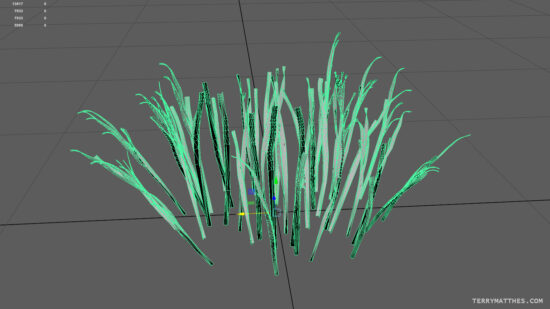
WineCartModelShotC (http://www NULL.terrymatthes NULL.com/wp-content/uploads/2018/01/WineCartModelShotC NULL.jpg)

I always like modeling objects from nature as I find the process both creative and freeing. When modeling mechanical objects you can really get hung up on your reference. I find this isn’t the case with a lot of organic assets. The flowers in the scene are Freesia (https://en NULL.wikipedia NULL.org/wiki/Freesia). There is also a yellow flower which I have yet to identify. I’ve modeled four different variations of the Freesia and that should be more than enough. My next step is to place them in the scene. As far as the stems go I’m going to wait until I have the placement of the flowers finalized then I will create the stems. This way I can have a single stem run up to several flowers. If I was to do this in reverse I would have to remodel the stems every time I changed the placement of the flower heads.
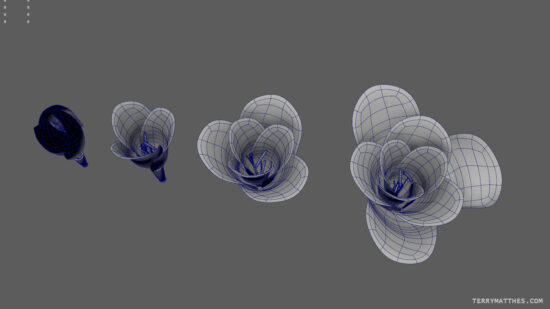
WineCartModelShotB (http://www NULL.terrymatthes NULL.com/wp-content/uploads/2018/01/WineCartModelShotB NULL.jpg)

The end goal of this project is just to be a still shot, I’m not planning any animation. If I was to add any it would be a simple camera push. I’ve got a VRay sun node lighting the scene which is a nice change due to its simplicity. My last scene was indoors and had many many lights of varying temperatures and types. Below are two of the shots I found on https://ruffledblog.com/ (https://ruffledblog NULL.com/) that I’m basing the scene on. I’m about two thirds of the way done the modeling and when I finish I will make a follow up post. As always if you have any questions don’t be afraid to ask as I love to help others when I can :)

WineCartModelShotE (http://www NULL.terrymatthes NULL.com/wp-content/uploads/2018/01/WineCartModelShotE NULL.jpg)

[R&D] Mental Ray Brasserie

Brasserie B

Brasserie B (http://www NULL.terrymatthes NULL.com/wp-content/uploads/2016/09/BrasserieB NULL.jpg)

Brasserie A (http://www NULL.terrymatthes NULL.com/wp-content/uploads/2016/09/BrasserieA NULL.jpg)

Brasserie 3 (http://www NULL.terrymatthes NULL.com/wp-content/uploads/2016/09/Brasserie3 NULL.jpg)

Brasserie 1 (http://www NULL.terrymatthes NULL.com/wp-content/uploads/2016/09/Brasserie1 NULL.jpg)

[Game] UE4 Mesozoic Forest Update

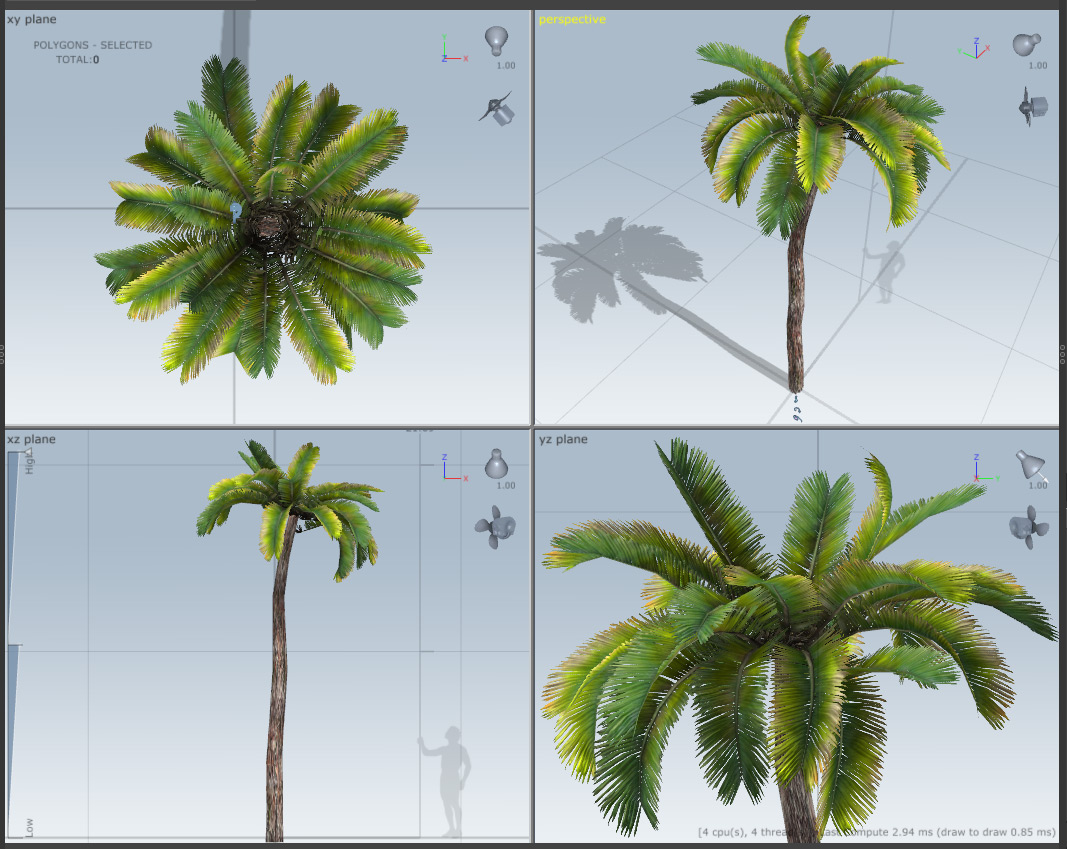
I’ve completed a cycad as well as a test for ground cover. I’m aware that there was no grass in the Jurassic period, these grasses are just place holders for ferns cards. The real test was to see if dynamic raytraced lighting shadows the individual grass cards and they do. The video below is made with no baked lighting. It uses Light Propagation Volumes (https://docs NULL.unrealengine NULL.com/latest/INT/Engine/Rendering/LightingAndShadows/LightPropagationVolumes/) that can be enabled in UE4. If you’re interested in creating a similar scene with completely dynamic lighting I suggest you check out this book (https://www NULL.amazon NULL.ca/Unreal-Engine-Lighting-Rendering-Essentials/dp/1785289063) to get a better understanding of light in the Unreal Engine.

[Game] UE4 Speedtree Mesozoic Forest

Speedtree Fern

(http://www NULL.terrymatthes NULL.com/wp-content/uploads/2015/09/cycad NULL.jpg)

Work has been interesting lately as you may or may not know Mortal Kombat X has been canceled on last gen and I had been working on that for the last 7 months, so that was a bit of a blow. I’m on to a new project though and a publisher I’ve never worked with before so things are new and interesting in that respect. In my spare time I’ve been reading about and really loving the updates to the Unreal Engine for instanced foliage. I’ve taken it upon myself to follow in Koola’s footsteps and create some amazing forest work. If you haven’t seen his work check out his Youtube channel (https://www NULL.youtube NULL.com/user/koooolalala) or WIP thead (https://forums NULL.unrealengine NULL.com/showthread NULL.php?58385-Koola-s-stuff) over at the Epic Games forums. If you’re not aware there have been some big changes to instanced foliage and you can now use Dynamic GI to light them. Coupled with DFAO (https://docs NULL.unrealengine NULL.com/latest/INT/Engine/Rendering/LightingAndShadows/DistanceFieldAmbientOcclusion/index NULL.html) (Distance Field Ambient Occlusion) and Ray Traced Shadows (https://docs NULL.unrealengine NULL.com/latest/INT/Engine/Rendering/LightingAndShadows/RayTracedDistanceFieldShadowing/index NULL.html#settings) it means no more waiting for crazy long lighting bakes. All this realtime lighting does come at a cost though and the performance hit isn’t small. To keep up I’ve had to upgrade my system, but it’s been due for a while.

My current rig (Intel Q9550 @ 2.9Ghz with 8GB RAM, Nvidia 560Ti and 10K RMP HDD) is 7 years old. I’ve decided to follow Epic’s suggestions (https://answers NULL.unrealengine NULL.com/questions/21631/im-building-my-own-pc-for-ue4-development-what-do NULL.html) and upgrade to a i7 5820k (6 core 3.3Ghz) with 32GB RAM and 2 SSDs. The only difference is I chose to go for an Nvidia 960 instead of a 770. With the new Nvidia line (http://wccftech NULL.com/nvidia-pascal-gpu-gtc-2015/) boasting a 10x performance increase coming out next year, I’m going to hold off on a major video card upgrade until then. If you’re interested in trying out the new GI system head over here (https://docs NULL.unrealengine NULL.com/latest/INT/Engine/Rendering/LightingAndShadows/LightPropagationVolumes/index NULL.html) to learn about Light Propagation Volumes and how to enable them in the new engine, there’s some “.ini” tweaking involved.

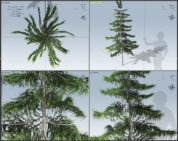
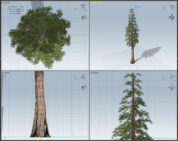
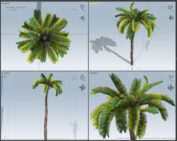
To test this out I’m creating a small Mesozic forest and I’ve Pinned some reference (https://www NULL.pinterest NULL.com/terrymatthes/prehistoric-forests/) up for anyone who wants to follow along. The biggest difference between forests in the Mesozoic and now is the lack of grasses. Ferns largely took their place. As a species grass didn’t evolve until about 70 Million years ago, which means it missed most of the dinosaurs. Another big difference is the shear amount of Cycads (https://en NULL.wikipedia NULL.org/wiki/Cycad) and Ginko Bilobas (https://en NULL.wikipedia NULL.org/wiki/Ginkgo_biloba). As you can imagine it would be nice to put a dinosaur in this forest, but I’m trying to concentrate on the forest itself and I’m looking locally for someone to collaborate with on the dinosaur(s). I’ve started to create speed tree templates I can work from for the plants while I wait for my new system to arrive. I’m not worrying about LOD too much right now as some early tests showed it’s handled automatically quite well by the Unreal Engine and Speedtree. One thing that’s not though is the lightmap UVs. They are OK, but do need tweaking. Your material also makes a HUGE difference. If you’re expecting to plop plants into your level with a directional light they are not going to look super. You need to put some work into a good material that will properly shade your plants. Here are three of the plant templates I’ve came up with so far. A couple of these are based on speed tree models that were tweaked for performance. I’m going to follow Koola’s suggestions and keep the lowest LOD’s at or below 7K polys. For now I’m using the default Speedtree textures, but will create high resolution custom ones for the final output. The elevation data for this project is based on GIS data from The National Map Viewer (http://nationalmap NULL.gov/viewer NULL.html). When that becomes a bigger part of the  project I’ll expand upon how that’s being used.

Speedtree Fern (http://www NULL.terrymatthes NULL.com/wp-content/uploads/2015/09/FernHigh NULL.jpg)Speedtree Small Pine (http://www NULL.terrymatthes NULL.com/wp-content/uploads/2015/09/ConiferSmall NULL.jpg)Speetree Giant Conifer (http://www NULL.terrymatthes NULL.com/wp-content/uploads/2015/09/CedarTall NULL.jpg)cycad (http://www NULL.terrymatthes NULL.com/wp-content/uploads/2015/09/cycad NULL.jpg)

[Game] World Machine Mountains

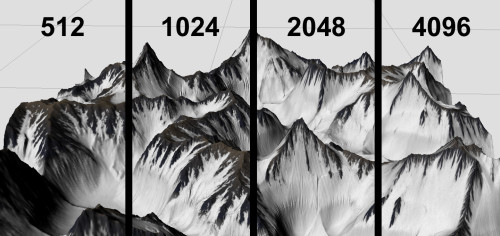
World Machine Detail Comparison

Mountains and terrain in general is something that I’ve wanted to experiment with more for quite some time. A project came up at work recently and I decided to try my hand at creating some custom terrain in World Machine. Typically my process for creating terrain was fairly simple. First I would model the terrain very roughly on a plane in Zbrush, then I would add detail by adding Perlin noise values. Lastly I would render a height map of this in Maya and then import that into the engine. This time around I’m creating the mountains as a mesh to be rendered in Maya so I though this would be a nice opportunity to use World Machine. The mountains in the shot are to be very sharp and pointed with heavy snow cover. The image below is a node network in World Machine showing the creation of my mountains that led to their final output.

Simple World Machine Mountain Network (http://www NULL.terrymatthes NULL.com/wp-content/uploads/2015/05/wm_MountainNetwork NULL.gif)
The base of the mountains comes from two very strong height maps. The gross shapes are formed from the height map values of a Voronoi noise. The breakup comes from Perlin noise. These two height maps are added together to create the base shape. A large-scale is used for both the Perlin and Voronoi noise to facilitate the larger details. If the noise were smaller this would increase the texture repetition in the noise and give us a higher frequency detail.

The next modification to the shape comes from the “Simple Transform” node. This node isn’t as simple as it’s name makes it out to be. It actually adds quite pronounced features to your terrain. You can create canyons, glacial wear, plateaus and other common terrain features to be eroded further with World Machine’s “Erosion” node. The “Select Height” node is used next. This lets us specify the top heights of the terrain so we can then erode the steep mountain faces in a different way then the low valleys. The low valley detail comes from the second Erosion node in the network. You might think its silly to erode the same terrain twice, but if you look closely you’ll see we’ve plugged the height map output from the first Erosion node into both the main input of the second Erosion node and the mask input. Now we can tweak this node to change the low altitude detail because the mask protects the steep mountain face detail from being eroded again.

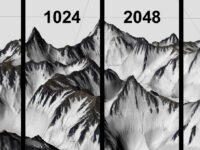
Lastly we add snow by plugging the second Erosion node into a “Snow” node. This will give you a basic setup you can tweak for snowy mountains. There is a “Basic Coverage” node used to add some detail, but these mountains will be too far away to benefit from this in the shot. I took some comparison shots of the mountains in world machine at different details. You can set the resolution of your terrain in the “World Properties”. The biggest difference you notice is the tightness of the eroded crevasses. The higher the resolution is the narrower they become. For really far of mountains you could get away with 512 if you had some heavy depth of field. I would prefer the detail in a resolution of 2048 for most shots thought. The jump from 2048 to 4096 doesn’t yield as significant a change as the jump from 1024 to 2048.

World Machine Detail Comparison (http://www NULL.terrymatthes NULL.com/wp-content/uploads/2015/05/wmComparison NULL.jpg)

That is the base of the mountains for the project, the next part is the sky behind them. I plan on using high resolution NASA galaxies photos in the sky. I’m going to use the photos to texture the emission  of particles coming off of a polygon plane in Maya.

[Game] Combat Cross Final

Castlevania Combat Cross

Combat Cross WIP 1 (http://www NULL.terrymatthes NULL.com/wp-content/uploads/2014/04/combatCrossWIP1_001 NULL.jpg)
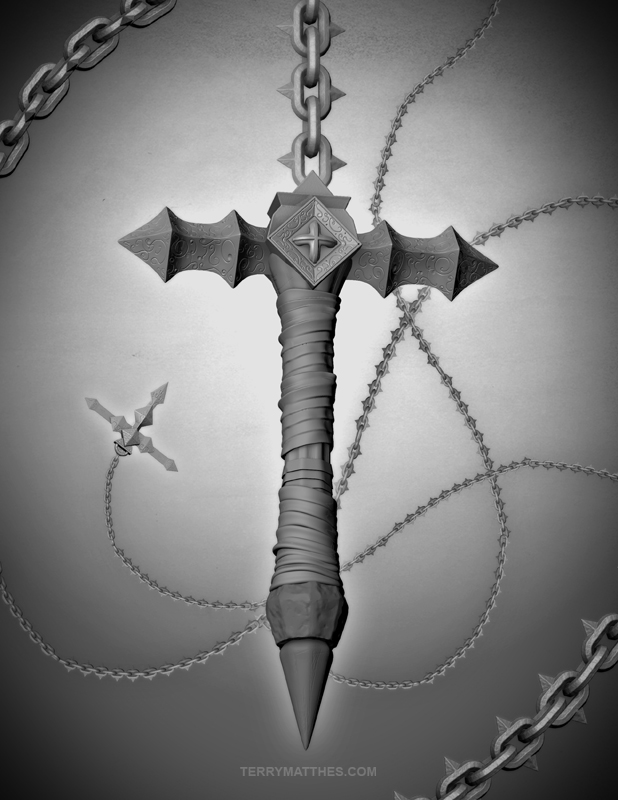
After a bit of a later night I’ve finished my submission for work. Most of the chains are ran along a CV curve, with a few being placed in post. I rendered out each element so that if needed I could rearrange the composition. I tried to keep the rendering fairly simple as I just didn’t have enough time to model and render the cross with proper materials. This limitation almost made it more fun as a project though. Instead of locking down the composition before rendering I could play with it in any way I chose after. This felt like more of an artistic approach which is in with the spirit of the project. I used very simple MIA materials and an ambient occlusion pass when composting everything. The original was rendered at 300 DPI as it was to be printed.

Castlevania Combat Cross (http://www NULL.terrymatthes NULL.com/wp-content/uploads/2014/04/terrancematthes_artsub NULL.jpg)

[Game] Combat Cross WIP 1

Combat Cross WIP 1

I’m a sucker for gothic and macabre games. When the Castlevania: Lords of Shadow 2 came out last month I new I had to play it. Lords of Shadow 2 is a lot of fun in it’s own right, but I really missed the awesome whip animations in the original reboot. Now Dracula uses his own blood as a type of magic whip and the splashy nature of this doesn’t feel as solid as the chain whip in the last game. Work is starting to get busy as we near the end of a project and there has been a company wide call for art submissions. There’s a raffle with prizes to be won based on all the entries they receive. We have just over a week until we have to submit our art and that’s a little less of a heads up than I would like. To make up for the short time I’ve decided to do a prop instead of a scene.

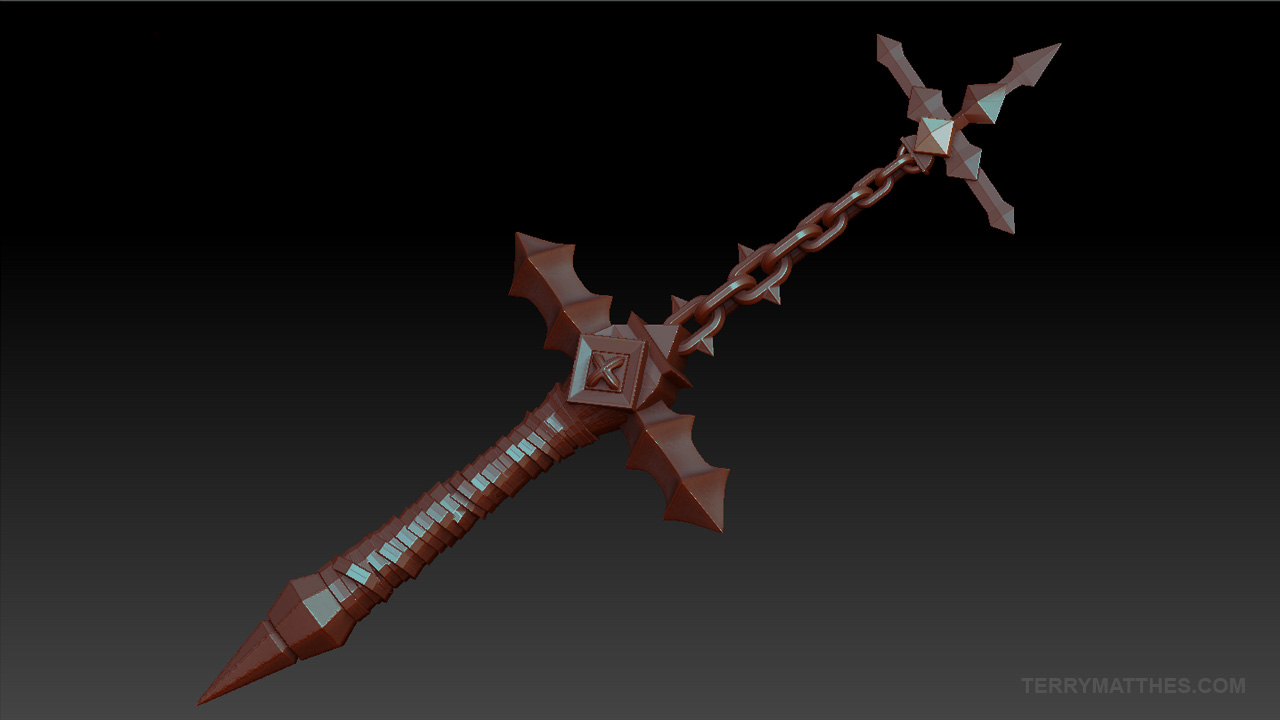
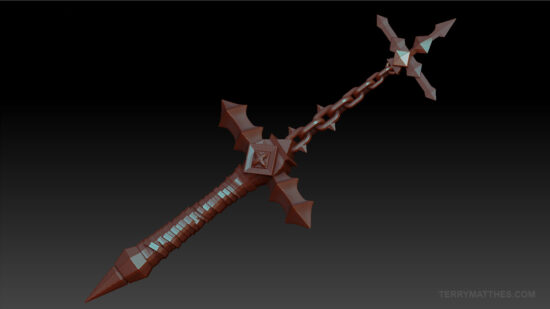
My final submission will be a rendered shot of the Combat Cross laying on a cracked marble floor aged and covered in cob webs. The first step was to model the basic shapes of the cross. For most of this I started with primitives in ZBrush. If a shape was made of multiple primitives I would merge them, create a dynamesh with the new merged tool and then ctrl drag to connect their topology as a single dynamesh. I haven’t decided if I want to do a low poly cage over the entire mesh, or just export the decimated parts into Maya and then group them all. The leather rapped handle was created in Maya by making low res polygon rings and placing them up and down the shaft of the cross. The next step for them will be to smooth them out in ZBrush and using the move tool to make them overlap without penetrating strangely.Combat Cross WIP 1 (http://www NULL.terrymatthes NULL.com/wp-content/uploads/2014/04/combatCrossWIP1_001 NULL.jpg)
I’m not 100% sure, but I think I’ll be chosing to render this with VRay instead of Mental Ray. I know I’m going to want a layered material for the dust over all the surfaces and Mental Ray drops the ball entirely on this. There is a layered shader, but it doesn’t make it all the way through the rendering pipeline unscathed. VRay also seems to be a lot faster in general. I’ll be posting more about the cross this week as the submission is due this Friday (April 11th 2014).

[Game] A Grave Affair

Grave Texture Mapped UV Islands

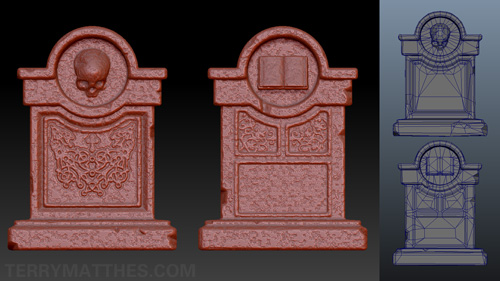
I’m creating a cemetery scene so you can imagine that I’m going to need some tombstones. I have sculpted another since my last WIP and thought I would share it. As I was breaking down the scene I was trying to think of ways I could maximize my work time. I wanted to make sure I wasn’t sculpting more assets than I needed to make the scene look full. From that point on I decided that all the tombstones were going to have a different design on each side. This would let me cut the number of tombstones that needed to be created in half.

Just like the last mesh I started in ZBrush my sculpting the general shape. With hard objects like this I like to start by smashing together basic geometric shapes with Dynamesh. After I have the basic shape it’s time to save a copy and start sculpting wear and tear. I was able to use the noise profile that I saved from my last sculpt to break up the noise on this one as well. Saving out the noise and other commonly used elements will also help me to keep things artistically cohesive throughout the production of the scene.

(http://www NULL.terrymatthes NULL.com/wp-content/uploads/2013/01/gravesculptL NULL.jpg)

Dynamesh is your best friend in ZBrush while creating game assets! Maybe it’s because I started working with 3D before ZBrush was around, but I just love the ability to kit bash with ZBrush while staying largely ignorant of topology. Gone are the days of matching up verts and integrating meshes before they can be treated as a single surface. With  the tombstone here I was able to take a human skull I had modeled for a previous project and insert it into the top of the grave. The book sculpted the same way, but I created the book within ZBrush as a separate subtool. If you’ve never merged dynamesh objects before it’s actually quite simple. Start by making sure both objects are dynameshes themselves and then use subtool master to merge all visible subtools. They aren’t quite the same yet though. They should be one sub tool, but you’re going to have to ctrl drag and empty marquee selection to have ZBrush retopologize your dynamesh subtool once more. Bam! It should be all one surface now. If the objects look to crude then you need to turn up your dynamesh resolution before dragging to retopologize.

Like most of the assets in the scene I’m trying to keep the poly count around 1K. And speaking of polygons I wanted to address a common misconception about them. A lot of people fret about poly count in-game design. Whether its triangles or quads less is not always better. We’ve gotten to the point on mid level hardware where poly count isn’t the limiting factor it used to be. “I spent a solid few months of optimizing polys, lightmap UV channels, collision meshs for everything in UT and the act of stripping 2million polys out of a level generally improved the FPS by 2 or 3 frames.” – Kevin Johnstone (http://www NULL.polycount NULL.com/forum/showthread NULL.php?t=50588). Texture maps represent modern geometry more than polygons do at levels of high frequency detail. We are using lots of texture memory to affect and displace geometry. Stripping down the polygons to an absolute minimum is going to cripple the ability of a normal/displacement map to affect the perceived detail of your asset. If you need a few more verts to make an edge look better just do it!

If textures are the new limiting factor then what you should be aware of is “draw calls“. Your video card can only do so many of these per rendered frame and keeping this low is going to have a big impact on performance. A draw call is done for each material on a mesh every frame.  One mesh doesn’t equal one draw call. A lot of engines will actually limit the number of materials you can put on a single mesh.  The 600 series Nvidia cards can do roughly 600 draw calls per frame and that’s pretty good. When you think about how many textures that is you might that’s a lot, but each of those calls is slowing down performance.  One last thing worth mentioning is that even instanced meshes with the exact same materials will require separate draw calls. This means that if you have a metropolitan city full of instanced buildings each individual building is adding another draw call. If you have more than one material on heavily instanced assets you can see how this would start to adversely affect your frame rates. Just try and keep the number of materials on each mesh as low as possible :)

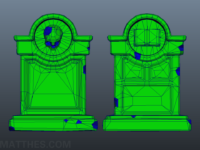
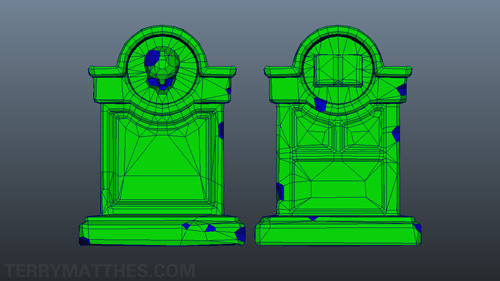
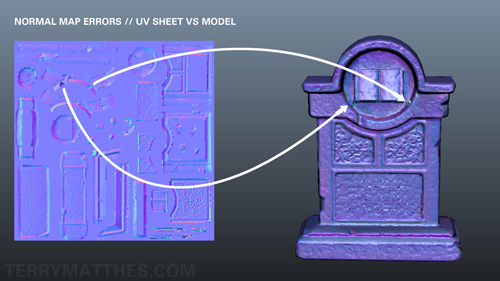
Just like our last tombstone mesh I broke out the damaged bits and strong surface changes into their own “UV Islands”. These islands are keeping xNormal from casting seams along the edges of those areas. The key is to break out UVs where the geometry sharply differs from the continuity of the surface around it. In the following diagram I’ve outlined the UV islands in blue on both the mesh and UV editor. You can see how these areas differ from the geometry surrounding them. Doing this with your light map UVs as well as your texture UVs will help shadow fall across your object with less error.

(http://www NULL.terrymatthes NULL.com/wp-content/uploads/2013/01/GraveUVL NULL.png)

During the initial baking of normals I produced two errors outlined in below. These particular errors were not from UV mapping, but from floating vertices that weren’t connected with an edge. Retopologizing in ZBrush is awesome, but now without its downside. I find the vertices you lay down quite hard to see and the cursor snapping can give you errors if you’re backed to far out by not connecting your edges. On closer inspection of the erroneous areas I was able to find the floating geometry and correct it. Now you can see how this got rid of those errors on the updated normal map texture. Always inspect your errors thoroughly. Chances are your error is coming from errant geometry at the site or flipped normals. If your normal map comes out looking like details are being projected on from the front to the back or vise versa you’re having scale issues. Your models scale is too small for xNormal to properly bake the texture map.  The UDK’s native scale in Maya is too small so you’re going to have to scale up your geometry 20-50 times its actual size to get proper normal map bakes.

Normal Map Errors on UVs (http://www NULL.terrymatthes NULL.com/wp-content/uploads/2013/01/UVerrorL NULL.jpg)

The job I’m working has the potential for me to work on some “magic” type effects so I am going to post a couple R&D clips this weekend. These will be geared more towards film although I will try to explain the fundamentals well enough so that you may apply it to Cascade in the UDK. If your still  feeling confused about baking normals? Check out Tombstone WIP2 (http://www NULL.terrymatthes NULL.com/unreal-2/materials/tombstone-wip-2/) to learn more about game asset creation with the UDK in mind. Until then Cheers,

Terry

[Game] Game Trees WIP

Evegreen Trees Work In Progress

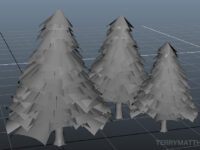
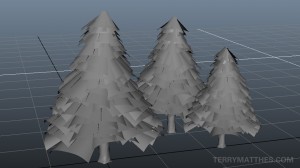
Evegreen Trees Work In Progress (http://www NULL.terrymatthes NULL.com/wp-content/uploads/2012/12/trees1 NULL.jpg)I’ve been watching people model trees all at work over the past few days and it’s driving me crazy. I must make a tree! So in keeping with my current project I’m going to sculpt an evergreen tree in the with snow on it for import into the Unreal Development Kit. The first thing I wanted to get done was the base mesh. I with the Speed Tree program that comes with the UDK. You can’t export from here but it does create the geometry in a pretty efficient way. After tooling around with settings for about an hour I was able to get a look I liked. Next I needed to recreate the same style of geometry in Maya. To get things started I began with the trunk. The trunk is pretty straight forward. It’s just a cylinder extruded along an ever-so crooked EP Curve. The next thing to do was create the branches. To save time you can model one branch and use Duplicate Special(Edit > Duplicate Special) to space a bunch of them along the +Y axis. This will not work properly unless your branch is pointing outwards from the center of your trunk with its pivot point also at that center of the trunk.

Use the Distance Tool (Create > Measurement Tool > Distance Tool) to get the  height of your tree. Divide your height by how many branches you want. Add that value to the Translate Y Offset. And don’t forget to also offset the Y rotation so the branches don’t space out in a straight row. Record (write down) your offset values as you’ll be using the same values to duplicate and space your “Fronds” or leaf cards. Your cards can be as simple or as complex as you want. Since I am just using this mesh as a guide in Zbrush I will keep my cards simple. I used a Bend Deformer ([Animation]Create Deformer > Non Linear > Bend) to curve a plane with 5 divisions in the height and only one in depth. I then tapered the sheet by selecting all the vertices at the end and scaling them together. You could stop modeling here and start texturing, but I want the poly count a lot lower. A Single tree as it stands is around 5000 vertices and unless you’re in a cinematic situation where you can control the poly count that’s just way to high for a tree. I think by taking this into Zbrush we can achieve a similar look at no more than 25% of the vertices. As added punishment I’m also going to push myself to use poly paint on this sculpt X_X

Terry