
 (http://www NULL.terrymatthes NULL.com/wp-content/uploads/2017/05/GISettings NULL.jpg)
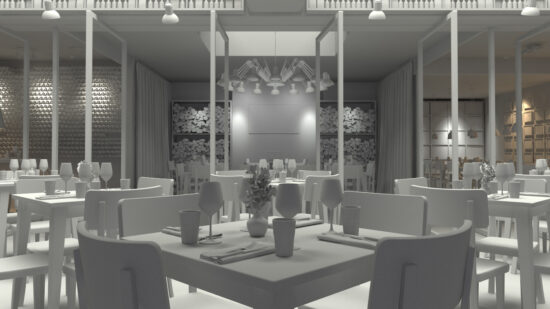
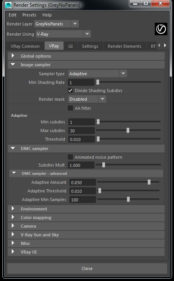 (http://www NULL.terrymatthes NULL.com/wp-content/uploads/2017/05/primarySettings NULL.jpg)I took some time over the last few months to rework a scene I had modeled last year. I’ve redone all the lighting and materials in Vray as opposed to Mental Ray. A big part of this project was crushing render times down while retaining quality in the right places. I’m in the process of rendering an animation of the environment. There is a lot of glass so if the settings aren’t balanced right between the aliasing and reflection/refraction quality the animation will “shimmer” where the glass in moving. The animation is 5 seconds at 30FPS or 150 frames. This means that even at the current render times of ~90 minutes a frame the animation would take 225 hours. I knew this would be a challenge, but what better way to practice using the diagnostic tools? The longer render times are actually acceptable given these are the minimum settings to avoid shimmering in the glass. If this needed to be done sooner I would ship this off to an online farm or ask some of my friends to render a portion of the frames for me.
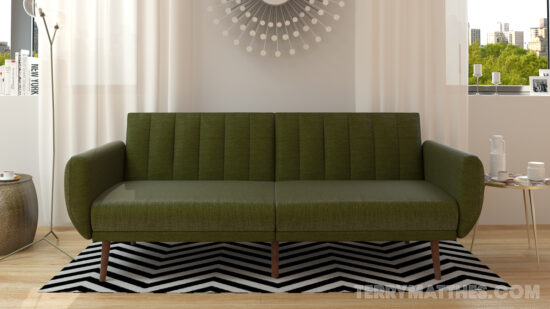
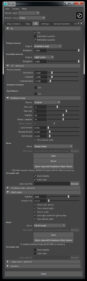
I’ve baked out all of the GI so that I can start and stop the render when my PC has some spare time. If I didn’t bake out the GI I would get changes in the grain when starting and stopping the render sessions. I’ve chosen to go with Light cache as my primary bounce solver while Irradiance mapping will be solving all of the secondary bounces. In this post I’ve included 2 shots of my render settings. One for GI and the other for primary rays/Secondary (DMC rays). I tried to include all pertinent information in the shots. If you can’t see the setting it was left at default.
 (http://www NULL.terrymatthes NULL.com/wp-content/uploads/2017/05/witteveenNB NULL.jpg)
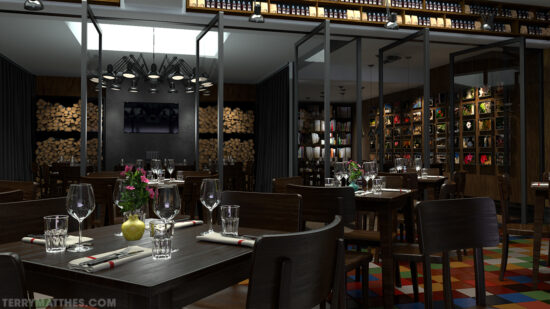
Some of the materials were made in Substance Designer, while other’s were built right in Maya. One thing in the future I would like to experiment with is instancing. There is a lot of duplicate geometry between the logs and the wine bottles, the cutlery could be considered another culprit. The books and nic nacs on the back shelf are all HDRI shots of a bookshelf inside my living room. Next I created masks for each group of books. To keep things simple I created several 4K texture atlases for the bookshelf items and the pictures. I then merged all the picture geometry together. If I wanted to put a different picture in the frame I would simply move the UV cords of the corresponding faces over a new area of the atlas.
 (http://www NULL.terrymatthes NULL.com/wp-content/uploads/2017/05/witteveenVrayGray NULL.jpg)
The render settings in the attached images worked for me. I give them as a guide, but each project is specific and your settings will probably have to change to suit the exact needs of your scene. The primary rays are kept as low as can be. These are the heavy lifters we want talking care of edge cleanup (anti-aliasing). Pushing this too high will cleanup up your edges, but it will also force needlessly high samples on areas of your scene that don’t need it. Keep this as low as possible. The DMC (advanced) settings are way way higher. This is where you’re going to see a lot of difference in the clarity of the surfaces. Remember the primary rays are really only there to alias all your edges, not to cleanup your image. We want the secondary bounces to clarify the fine details in the materials. A great explanation of this technique can be found over at Akin Bilgic’s blog (http://www NULL.cggallery NULL.com/tutorials/vray_optimization/).
Before I begin the render I have to create all my material ID masks. I’ll take these into Nuke on my Mac mini with some stills and start the colour corrections in post. When the render is done I’ll apply the same node chain to the animation and then bake that all out as a MP4. I’ll post the animation and colour corrected stills when I finish them and link them to this post.
Good luck and if you have any questions don’t be afraid to reach out or comment in the post below. I’ll admit the comment section is a little ugly, but I haven’t had time to adjust the CSS styles on it since changing formats. One day… one day I’ll have time for everything :) Right? :(
 (http://www NULL.terrymatthes NULL.com/wp-content/uploads/2017/05/witteveenNC NULL.jpg)

 (http://www
 (http://www
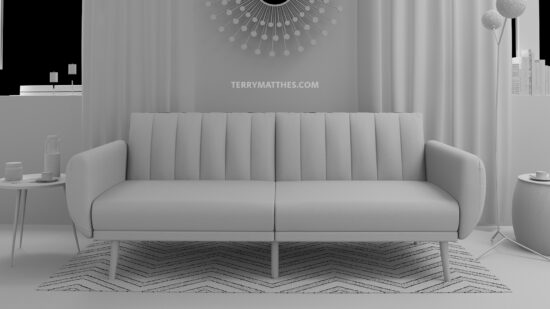 (http://www
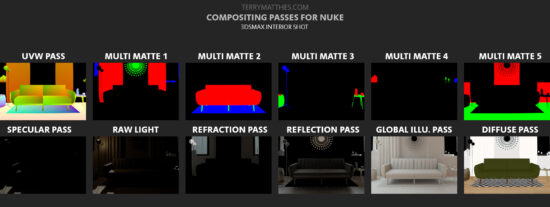 (http://www
 (http://www
 (http://www