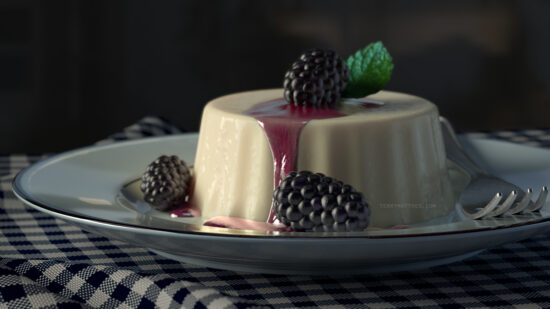
Food is something I’ve wanted to render for a while. It seemed like a good rendering challenge given how familiar people are with the look of food. When I think of what really sells an object in a scene as “real” it’s the surface detail. I could have used displacement textures to refine the surface detail, but in this case I modeled the surface detail. I find modeling almost always gives a faster rendering result. Displacement takes a long time to calculate and on top of that you’re going to need a large resolution displacement material to get good results again adding to the render times.
 (http://www NULL.terrymatthes NULL.com/wp-content/uploads/2016/12/Panacotta1280 NULL.jpg)
Even with a model that’s a quarter of a million polygons its still faster to render the result. The base shape of the panacotta was made in Maya to scale in cm then brought into ZBrush. In ZBrush I added some generic noise as a base using ‘surface noise’. I then went in with the ‘Dam standard’ brush and added some extra pitting to the surface. Finally I went over some of the edges with the ‘Trim dynamic’ brush to give the appearance of scraping or tearing where the dessert would have contacted the mold as it was popped out.
 (http://www NULL.terrymatthes NULL.com/wp-content/uploads/2016/12/Panacotta_Grey NULL.jpg)
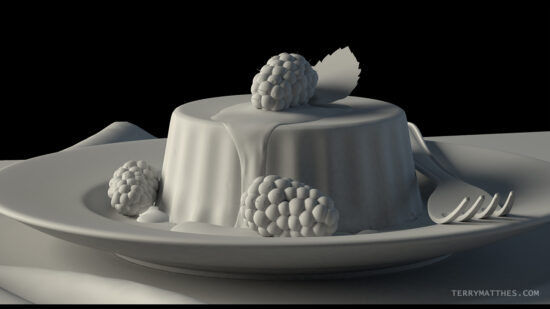
To create the blackberries I started in Maya. I made a bunch of polygon spheres and placed them in the basic shape with an interior shape that filled the gaps in between the spheres. This was then brought into Zbrush as an OBJ. Quickly after turning the mesh into a Dynamesh I used the ‘Nanomesh’ feature to drag hairs out of the berries faces.
Originally I had planned to create a fluid simulation for the sauce, but time did not permit. I instead drew a mask over the surface of the panacotta in ZBrush. I then used the ‘Extract‘ option to create a copy of the masked area. This was then sculpted into the sauce that lays over the dessert. The sauces on the plate were simple polygons modeled in Maya.
 (http://www NULL.terrymatthes NULL.com/wp-content/uploads/2016/12/panacottaComp NULL.jpg)
An unexpected challenge to this piece was the colour correction. From one device to the next the colour would vary quite a bit. With furniture and objects this isn’t as much of a problem as with food. The colour being too saturated can leave the food looking unappealing, too bright and it looks fake. In the end I tried to achieve a good balance between the two given the devices the final image was to be viewed on.
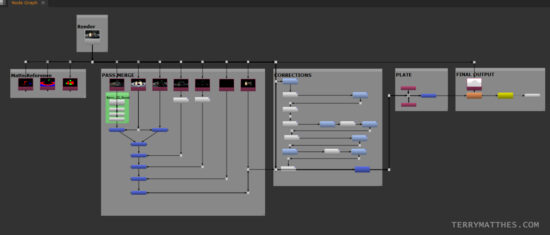
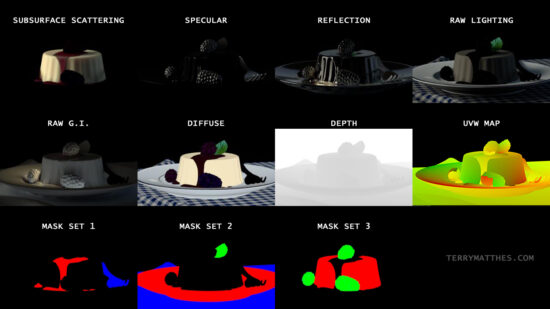
Below is a shot of my VRay passes from Maya. Nothing too crazy going on here. I should mention that this is the first time I’ve used ‘Raw’ passes in VRay. Specifically ‘Raw Global Illumination’ and ‘Raw Lighting’. I’m happy with the result. The compositing of those nodes varies slightly from traditional passes. They are merged with the ‘Diffuse pass’ using a ‘Merge’ node set to ‘Multiply’ rather than simply merging all the passes atop each other with Merge nodes set to ‘Plus’.
 (http://www NULL.terrymatthes NULL.com/wp-content/uploads/2016/12/PanacottaPasses NULL.jpg)
Comments (0)