« Posts under Technical Art

[R&D] V-Ray WIP

V-Ray Lamp Scene Work In Progress

Yeah that’s right… I’ve decided to finally check out VRay and I have to say that so far it’s been a lot of fun to work with. I haven’t gone through all the settings yet, but I’m trying to get through working on a piece while learning the suite. I’ve decided to render a bedside lamp and glass full of flowers. Most of the work so far has gone into the lamp shade and getting everything proportioned. One thing I will say is that linear workflow (gamma corrected workflow) is a lot easier in  VRay. Gone are the days of needing a gamma adjustment node on every single file texture you import.
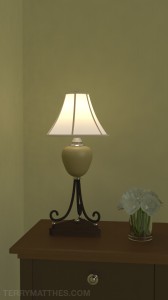
V-Ray Lamp Scene Work In Progress (http://www NULL.terrymatthes NULL.com/wp-content/uploads/2012/10/lampTest3 NULL.jpg)While rendering I noticed that meshes through Maya’s smoothed approximation method (2 or 3 on your keyboard) weren’t showing up smoothed in the actual render. I fixed this by checking the radio box “Render viewport subdivision”  in the VRay global options. You should know that when you check this your render times might spike up. This is because by default VRay subdivides they smoothed preview many more times than you would actually need. You can fix this by going back into the “Render Globals” of VRay’s options and changing the displacement/subdivision group option max subdivision from 256 to down to something around 8. To light this scene I have a “rectangle light” for fill and a “spherical light” placed in the lamp shade. When I’ve progressed some more I’ll post more about the lamp shade material as well as the actual light values. Until then, cheers and good luck with all your renders :)


Late Night With Mental Ray

(http://www NULL.terrymatthes NULL.com/wp-content/uploads/2012/09/TMNIGHT2 NULL.jpg)I have wanted to try a late night render for some time and I got an excuse to do so recently. A lot of the time went into getting the final gather and global illumination to behave correctly.  There are two area lights outside the windows lighting the scene along with the two point lights; one in each lamp. The lamp’s point lights have their colour temperature controlled by a mib blackbody node set to around. The floor panel is a flat plane using a 2D bump (no normals) to pop out the individual floor planks. Underneath it, a wood texture to support this.

The ottoman in the middle of the room is procedurally textured using the 2D Texture Cloth node to create a fine bump across the surface as well as to define the diffuse colour of the fabric. Some unevenness is applied to the 2D Placement Node of the ottoman’s material to simulate uneven stretching of the fabric. This effect is applied subtly though. A stronger effect is the light shining through the surface of the lamp shade. This was achieved through using Maya’s default translucent property on a simple lambert shader. A yellowish colour was then picked for the diffuse and I turned down the diffuse value of the material to around “0.4”. The area light to the right of the scene is colored with a dim blue light to simulate the way your eyes desaturate colours in low light conditions. A blue tint was also added afterwards to the whole image in Photoshop. To achieve the final gather I wanted I used three point lights that didn’t cast diffuse or specular light. These point lights simply cast photons (around 300k each) to paint the rooms with final gather points. One point light was placed in the middle of each room. Before rendering I made sure to save out both my final gather and global illuminations passes. The cat on the couch was done using Maya’s native fur system. If I were to change anything I think I would paint a custom fur length map for the cat so the hair wasn’t the same length all over.

In Photoshop I applied an ambient occlusion render over the entire image, set it’s opacity to around 30% and changed  it’s layer’s draw type to multiply. I rendered this image out and an EXR and it gave me the ability to really pull the values of the scene in a wide range due to the raw nature of an EXR. To select the individual objects in the scene I rendered out a mask pass to make selecting the individual elements of the scene much easier. The mask pass was made as a separate render layer. I made 5 different Maya surface shaders and labeled them: red, green, blue, black, and white. I then applied these shaders to everything in the scene and made sure that no to objects with the same colour overlapped.

If anyone has any questions feel free to comment below or to contact me about the questions. Have a nice day :)

[R&D] Zbrush to Maya: Tiling Meshes

Tiling Rock Mesh

I’ve wanted to try this tutorial for a while and now that I have I thought I would share it with you guys. Creating seamless textures (http://www NULL.terrymatthes NULL.com/unreal-2/materials/seamless-textures-in-photoshop/http://) is one thing, but tiling mesh surfaces isn’t always as easy as it may seem. Osart has posted a tutorial (http://osart3d NULL.wordpress NULL.com/home-page/tutorial-creating-perfectly-tiling-meshes-in-zbrush-for-use-in-videogame-environments/) on his blog (http://osart3d NULL.wordpress NULL.com/) that walks you through the process with a couple of different paths you can take when it comes to developing your low poly version of the mesh. The process involves using Zbrush to create a tiling displacement map. The only part of the tutorial I got hung up on was the UV section. At one point he asks you to “normalize” a group of UVs. Normalizing the UVs is done by selecting the particular UV shell you want and then going to Edit UVs > Normalize under the Polygon menu tab. This scales the shell you have selected so that it takes up the entire 0-1 texture coordinate space.

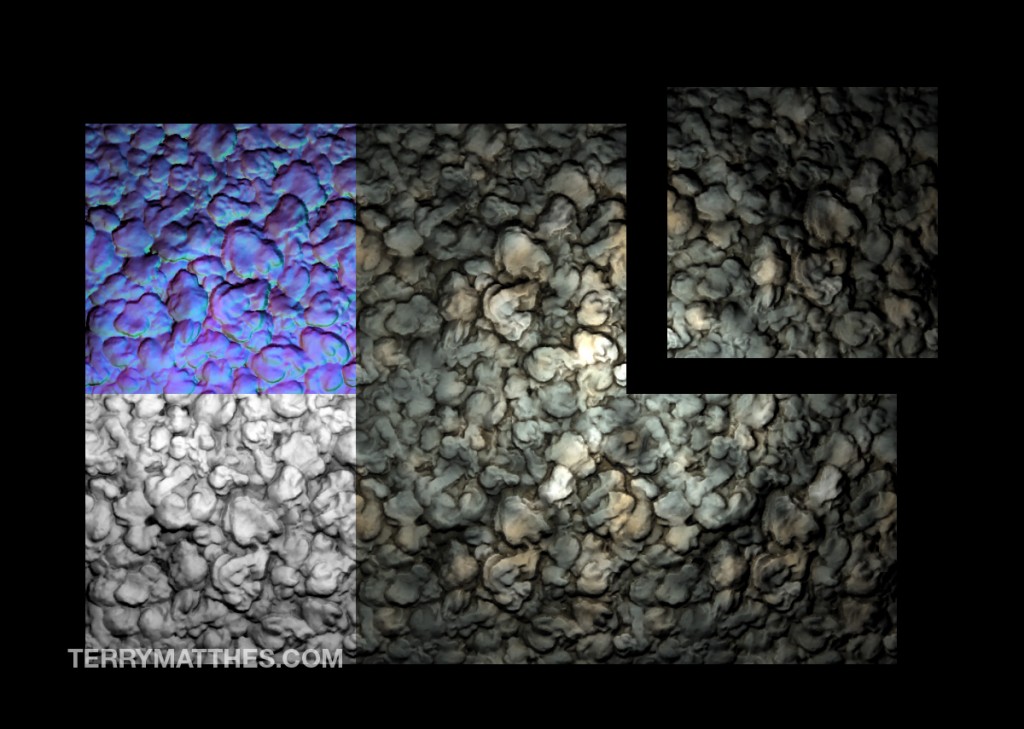
The tutorial is full of really really great stuff. You should go RIGHT NOW and check it out. Below is a tiling rock mesh I made using Osart’s Tutorial (http://osart3d NULL.wordpress NULL.com/home-page/tutorial-creating-perfectly-tiling-meshes-in-zbrush-for-use-in-videogame-environments/). To make the normal and ambient occlusion maps I used xNormal. The diffuse map was painted in Photoshop. If you have any questions I would try and get a hold of Osart, or I could help you as well.

The next step I’m going to take is to bring this mesh into the UDK and create a material for it. I’ll append this post with those results over the next few days.

Tiling Rock Mesh (http://www NULL.terrymatthes NULL.com/wp-content/uploads/2012/04/Rocks_togeather2 NULL.jpg)Weekend Update!

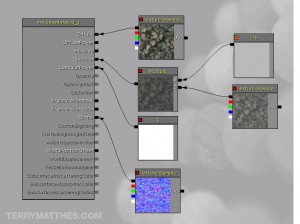
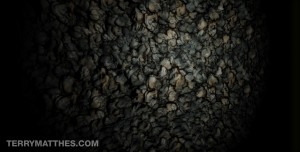
I’ve imported the mesh as an FBX into UDK and softened all the verts. Rocks have a funny specular pattern and it wasn’t something I could create within the UDK so I created a separate specular map. The following material uses a normal, diffuse, and specular map. Instead of explaining the whole map I thought I would just post it along with a shot of the rock mesh titled several times in the UDK.

Rocks Material (http://www NULL.terrymatthes NULL.com/wp-content/uploads/2012/04/rocks_material NULL.jpg)Rocks UDK (http://www NULL.terrymatthes NULL.com/wp-content/uploads/2012/04/rocks_UDK NULL.jpg)