Mountains and terrain in general is something that I’ve wanted to experiment with more for quite some time. A project came up at work recently and I decided to try my hand at creating some custom terrain in World Machine. Typically my process for creating terrain was fairly simple. First I would model the terrain very roughly on a plane in Zbrush, then I would add detail by adding Perlin noise values. Lastly I would render a height map of this in Maya and then import that into the engine. This time around I’m creating the mountains as a mesh to be rendered in Maya so I though this would be a nice opportunity to use World Machine. The mountains in the shot are to be very sharp and pointed with heavy snow cover. The image below is a node network in World Machine showing the creation of my mountains that led to their final output.
 (http://www NULL.terrymatthes NULL.com/wp-content/uploads/2015/05/wm_MountainNetwork NULL.gif)
The base of the mountains comes from two very strong height maps. The gross shapes are formed from the height map values of a Voronoi noise. The breakup comes from Perlin noise. These two height maps are added together to create the base shape. A large-scale is used for both the Perlin and Voronoi noise to facilitate the larger details. If the noise were smaller this would increase the texture repetition in the noise and give us a higher frequency detail.
The next modification to the shape comes from the “Simple Transform” node. This node isn’t as simple as it’s name makes it out to be. It actually adds quite pronounced features to your terrain. You can create canyons, glacial wear, plateaus and other common terrain features to be eroded further with World Machine’s “Erosion” node. The “Select Height” node is used next. This lets us specify the top heights of the terrain so we can then erode the steep mountain faces in a different way then the low valleys. The low valley detail comes from the second Erosion node in the network. You might think its silly to erode the same terrain twice, but if you look closely you’ll see we’ve plugged the height map output from the first Erosion node into both the main input of the second Erosion node and the mask input. Now we can tweak this node to change the low altitude detail because the mask protects the steep mountain face detail from being eroded again.
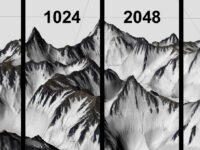
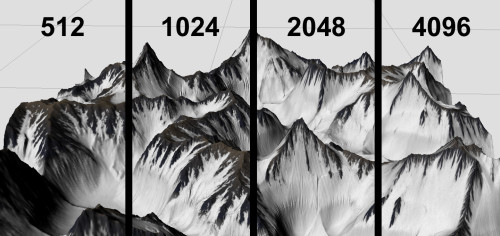
Lastly we add snow by plugging the second Erosion node into a “Snow” node. This will give you a basic setup you can tweak for snowy mountains. There is a “Basic Coverage” node used to add some detail, but these mountains will be too far away to benefit from this in the shot. I took some comparison shots of the mountains in world machine at different details. You can set the resolution of your terrain in the “World Properties”. The biggest difference you notice is the tightness of the eroded crevasses. The higher the resolution is the narrower they become. For really far of mountains you could get away with 512 if you had some heavy depth of field. I would prefer the detail in a resolution of 2048 for most shots thought. The jump from 2048 to 4096 doesn’t yield as significant a change as the jump from 1024 to 2048.
 (http://www NULL.terrymatthes NULL.com/wp-content/uploads/2015/05/wmComparison NULL.jpg)
That is the base of the mountains for the project, the next part is the sky behind them. I plan on using high resolution NASA galaxies photos in the sky. I’m going to use the photos to texture the emission of particles coming off of a polygon plane in Maya.

 (http://www
 (http://www
 (http://www
 (http://www
 (http://www
 (http://www
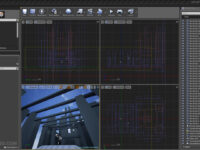
 (http://www
 (http://www
 (http://www
 (http://www
 (http://www