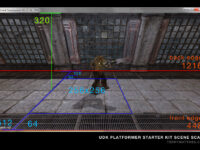
Introduction
You will have to recalculate the BSP every time you want to see the changes you have made.
This lesson will cover the use of geometry mode to transform a brush’s shape, or create an entirely new brush. There are several different ways a brush can be manipulated in “geometry mode” . Select your builder brush and then hit the geometry mode button (diagram 1).
 (http://www NULL.terrymatthes NULL.com/wp-content/uploads/2011/07/BSP01_02 NULL.png)
Diagram 1: Geometry Mode Button
 (http://www NULL.terrymatthes NULL.com/wp-content/uploads/2011/07/BSP01_01 NULL.png)
Diagram 2: Polygon Components
If you are in geometry mode all corners of your builder brush will have turned into large red squares. When manipulating your brush you should keep the different components of a brush in mind (diagram 2). Using these components often and effectively will save you time. Lets change the position of our “Builder Brush” components using the transform tools. Start by making sure the geometry mode has been turned on.
Tools
 (http://www NULL.terrymatthes NULL.com/wp-content/uploads/2011/07/BSP01_03 NULL.png)
Diagram 3: Geometry Tool Options
Edit
While in edit mode you can select and manipulate single or grouped vertices, edges and faces. Try selecting one of the vertices and then hold down CTRL and select a few more. There are no options in the “Properties” section (diagram 3) of the Geometry Tool for edit mode.
Extrude
This mode is available exclusively for manipulating the faces of your geometry. To access this mode you will first have to select a face that belongs to your brush. Only after doing this will the radio button become available.
(http://www NULL.terrymatthes NULL.com/wp-content/uploads/2011/07/bsp01_04 NULL.gif)To extrude a face simply select the face you want to extrude and pull outwards on the coordinate handles. For a more precise extrusion you can enter the “Length” and “Segments” of your desired extrusion into the “Properties” section. A properly extruded face can be seen in diagram 4.
Don’t forget you can also affect the translate handles without pulling on them. Try using these commands:
- translate X = LMB + CTRL
- translate Y = RMB + CTRL
- translate Z = LMB + RMB + CTRL
 (http://www NULL.terrymatthes NULL.com/wp-content/uploads/2011/07/BSP01_04 NULL.png)
Diagram 4: BSP Extrude Example
Brush Clip
Have you ever wanted to split a brush in two, or perhaps make two brushes from a single brush. If so the “Brush Clip” tool is just what you need. In the orthographic view port hold down the CTRL key and click with the RMB. You need two points that clearly cut across your brush to make the clip work (diagram5). Click “Apply” and you will notice that your brush has been split. You should also notice a line perpendicular to your clip line. This line is the “normal”.
 (http://www NULL.terrymatthes NULL.com/wp-content/uploads/2011/07/BSP01_05 NULL.png)
Diagram 5: BSP Clipping Example
The normal direction is changeable in the “Properties” section. Reversing the normal will reverse the cut. The normal has to be flipped before the cut is made to have any affect on the brush. Underneath “Flip Normal?” is the option “Split?”. This option will take the part of the brush that is usually clipped off and create a separate brush out of it .
Pen
The pen tool can create new brushes from points you lay down in a orthographic view. To create a brush connect three or more points ending at the first while holding down CTRL and clicking the RMB. The shape is set to auto extrude to a depth of 256.
Try connecting a punch of points together in a random shape. You will notice that the shape extrudes in the coordinate that matches its view. For an example of this create a shape in the top orthographic view and notice that it has been extruded along the Z axis. This extrusion will follow the world coordinate associated with the orthographic view you created it in.
In the “Settings” section you will notice several different options available to you. If “Auto extrude?” is turned off you will not get a default coordinate extrusion when you complete your pen path. The “Create Brush Shape?” option is used in conjunction with several features including the “Lathe” tool. When creating a shape you will notice that the editor always triangulates your shape. If this is something that you don’t want you can tick off the “Create Convex Polygons?” option and your new shapes will consist of quads and n-gons (diagram 6). Our last option is “Extrude Depth”. This is the default extrusion depth your pen tool will create when completed.
 (http://www NULL.terrymatthes NULL.com/wp-content/uploads/2011/07/BSP01_07 NULL.png)
Diagram 6: BSP Clipping Example
Lathe
The “Lathe” tool tries to take your shape and revolve it 360% around the dominant coordinate of your current orthographic window. The “Lathe” option can only be selected if you create a polygon with the “Pen” tool while the option “Create Brush Shape?” is turned on. Your shape will be green in colour.
The last two options will help to control how much of a 360% sweep your shape will occupy. The “Total Segments” option will set how many segments will make up the whole 360% turn. The “Segments” section will determine how many of those segments to actually produce.
Let’s make a simple square with the “Pen” tool and the “Auto Extrude?” option turned off. Start in the top orthographic view and make your four point selection (diagram 7). Now highlight the Y coordinate view (top right by default) and re-select your pen shape. In your options box set your “Total Segments” option to 16 and your “Segments” to 8. Now go ahead and lathe your selected shape.
You will notice that the inner radius of the lathe makes a semi circle. This is because our “Segments” option was set to half of our “Total Segments”.
 (http://www NULL.terrymatthes NULL.com/wp-content/uploads/2011/07/BSP01_08 NULL.png)
Diagram 7: BSP Lathe Example
Modifiers
Delete
Faces and verticies may be deleted using the “Delete” tool. Be careful when deleting. Look at your geometry closely and make sure you won’t get any unwanted shape changes from the deletion. Any faces you delete can always be repaired by using the “Create” modifier.
Create
Great for filling holes or bridging BSP the “Create” modifier works using verticies. Add a simple cube brush to the world and delete one of it’s faces.Now select the four verticies around the open face in a clockwise fashion and then hit ENTER. The face will have been created with its normal direction facing outwards (diagram 8). If you were to make the same selection counter-clockwise the face will have been created pointing inwards.
 (http://www NULL.terrymatthes NULL.com/wp-content/uploads/2011/07/BSP01_09 NULL.png)
Diagram 8: BSP Create Face
Flip
That thing we just talked about called the normal; it’s what the “Flip” modifier is all about. Working on faces, the Flip modifier reverses normals. Reversing a face’s normals flips the side of the polygon that is rendered. This is why you can’t see the insides of meshes when you pass through them in spectator mode. The normal for all of those faces is pointing outwards.
Triangulate
Fairly self explanatory, “Triangulate” breaks mesh faces up into triangles (diagram 9). If you notice a surface of your BSP is rendering funny triangulate the faces giving your the trouble. Chances are they’re n-gons of some sort. Try creating a cube brush and selecting it’s top face. Now triangulate that face and notice how that quad (four edged polygon) was broken up into two tris (three edged polygon).
 (http://www NULL.terrymatthes NULL.com/wp-content/uploads/2011/07/BSP01_10 NULL.png)
Diagram 9: BSP Triangulation
Turn
If you have two triangles on a brush that share a common edge you can “Turn” that edge .This rotates the the common edge of the triangles. Doing this causes the line that connects the two triangles to snap the the other 2 verticies that make up their 4 verticie border (diagram 10). If you still are unclear on this try using the pen tool to make a non extruded shape. Now “Triangulate” this shape and practice turning some border edges of triangles around.
 (http://www NULL.terrymatthes NULL.com/wp-content/uploads/2011/07/BSP01_11 NULL.png)
Diagram 10: BSP Turn Edge
Split
The “Split” tool adds “edge loops” or a series of verticies that run around your mesh connected by edges. Create a cube and select one of its edges and then use the Split modifier. Notice that a line was run around your shape that is perpendicular to the original edge you selected (diagram 11). This will always be the case when Splitting. In conjunction with the “Extrude” tool, splitting can work well to help you achieve whatever BSP shape you need. Diagram 13 illustrates the idea behind this.
 (http://www NULL.terrymatthes NULL.com/wp-content/uploads/2011/07/BSP01_12 NULL.png)
Diagram 11: Edge Split BSP With Extrusion
Optimize
Using “Optimize” on a group of faces with adjacent edges will create a new polygon in their place that has no edges running though it. Any verticies that are no longer required to keep the shape of the brush will be deleted. Depending how you merge your faces you can end up with some really “interesting” polygons. Try to make sure all your optimizations create quads or tris.
Weld
Verticies can be merged using the “Weld” tool. The position of the resultant merge will be the location of the first verticie you selected (diagram12). Create a cube and select two of the top verticies and Weld them togeather. Now do the same to the other two and then once more so you’re left with one verticie. Move the single remaining top verticie to the middle of the cube in the top orthographic view. You know have a pyramid. Wasn’t that fun?
 (http://www NULL.terrymatthes NULL.com/wp-content/uploads/2011/07/BSP01_13 NULL.png)
Diagram 12: Vertex Welding Steps
Conclusion
To exit geometry mode click the “camera mode” button (it looks like a TV camera) located beside the “geometry mode” button. It’s also of note that to “Undo” picked points with any of the tools you can hit the “ESC” key.

 (http://www
 (http://www
 (http://www
 (http://www
 (http://www
 (http://www
 (http://www
 (http://www