« Posts tagged render

[Game] Unreal Engine 4 Architectural Rendering WIP 1

UE4 Architectural WIP 1

I took a look at the realistic rendering demo (https://www NULL.unrealengine NULL.com/blog/new-release-realistic-rendering-showcase) that Epic Games posted. It has fairly nice soft shadowing and pays close attention to how your eyes behave in light. I think the gap between pre-rendered and real time visuals is staring to get close enough that you could definitely use the Unreal 4 Engine for pre-visualizations and not have to visually take a gigantic hit. In fact you can probably produce more work at a faster pace using UE4. I’m building a small scene to create as realistic a render as I can using the new engine. No holds bared and no excuses. There’s going to be soft shadows, GI, ray traced light going through and off reflective and refractive surfaces plus caustic reflections! That is “literally all the things” when it comes to setting up great looking render. I’m going to be following the “PBR” rendering workflow so if you’ve never taken that challenge up this should be a good intro. There’s also a new PBR rendering contest going on now at Polycount (http://www NULL.polycount NULL.com/2014/06/14/petrolblood/). Here’s another great link to a Poly count forum thread (http://www NULL.polycount NULL.com/forum/showthread NULL.php?t=124683) that deals with PBR in games.

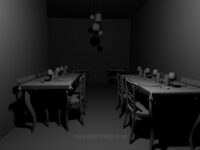
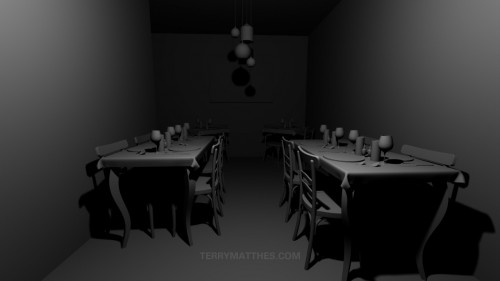
The shot you see here is a preliminary layout done in Maya with nearly all the rough models finished. The wall/ceiling moldings still have to be made. The next step is to take them into ZBrush. There I’m going to sculpt some more detail into some of the pieces and then use the retopology tools to lower the polygon count of each piece.
UE4 Architectural WIP 1 (http://www NULL.terrymatthes NULL.com/wp-content/uploads/2014/06/restaurant NULL.jpg)

[R&D] V-Ray WIP

V-Ray Lamp Scene Work In Progress

Yeah that’s right… I’ve decided to finally check out VRay and I have to say that so far it’s been a lot of fun to work with. I haven’t gone through all the settings yet, but I’m trying to get through working on a piece while learning the suite. I’ve decided to render a bedside lamp and glass full of flowers. Most of the work so far has gone into the lamp shade and getting everything proportioned. One thing I will say is that linear workflow (gamma corrected workflow) is a lot easier in  VRay. Gone are the days of needing a gamma adjustment node on every single file texture you import.

V-Ray Lamp Scene Work In Progress (http://www NULL.terrymatthes NULL.com/wp-content/uploads/2012/10/lampTest3 NULL.jpg)While rendering I noticed that meshes through Maya’s smoothed approximation method (2 or 3 on your keyboard) weren’t showing up smoothed in the actual render. I fixed this by checking the radio box “Render viewport subdivision”  in the VRay global options. You should know that when you check this your render times might spike up. This is because by default VRay subdivides they smoothed preview many more times than you would actually need. You can fix this by going back into the “Render Globals” of VRay’s options and changing the displacement/subdivision group option max subdivision from 256 to down to something around 8. To light this scene I have a “rectangle light” for fill and a “spherical light” placed in the lamp shade. When I’ve progressed some more I’ll post more about the lamp shade material as well as the actual light values. Until then, cheers and good luck with all your renders :)


Late Night With Mental Ray

(http://www NULL.terrymatthes NULL.com/wp-content/uploads/2012/09/TMNIGHT2 NULL.jpg)I have wanted to try a late night render for some time and I got an excuse to do so recently. A lot of the time went into getting the final gather and global illumination to behave correctly.  There are two area lights outside the windows lighting the scene along with the two point lights; one in each lamp. The lamp’s point lights have their colour temperature controlled by a mib blackbody node set to around. The floor panel is a flat plane using a 2D bump (no normals) to pop out the individual floor planks. Underneath it, a wood texture to support this.

The ottoman in the middle of the room is procedurally textured using the 2D Texture Cloth node to create a fine bump across the surface as well as to define the diffuse colour of the fabric. Some unevenness is applied to the 2D Placement Node of the ottoman’s material to simulate uneven stretching of the fabric. This effect is applied subtly though. A stronger effect is the light shining through the surface of the lamp shade. This was achieved through using Maya’s default translucent property on a simple lambert shader. A yellowish colour was then picked for the diffuse and I turned down the diffuse value of the material to around “0.4”. The area light to the right of the scene is colored with a dim blue light to simulate the way your eyes desaturate colours in low light conditions. A blue tint was also added afterwards to the whole image in Photoshop. To achieve the final gather I wanted I used three point lights that didn’t cast diffuse or specular light. These point lights simply cast photons (around 300k each) to paint the rooms with final gather points. One point light was placed in the middle of each room. Before rendering I made sure to save out both my final gather and global illuminations passes. The cat on the couch was done using Maya’s native fur system. If I were to change anything I think I would paint a custom fur length map for the cat so the hair wasn’t the same length all over.

In Photoshop I applied an ambient occlusion render over the entire image, set it’s opacity to around 30% and changed  it’s layer’s draw type to multiply. I rendered this image out and an EXR and it gave me the ability to really pull the values of the scene in a wide range due to the raw nature of an EXR. To select the individual objects in the scene I rendered out a mask pass to make selecting the individual elements of the scene much easier. The mask pass was made as a separate render layer. I made 5 different Maya surface shaders and labeled them: red, green, blue, black, and white. I then applied these shaders to everything in the scene and made sure that no to objects with the same colour overlapped.

If anyone has any questions feel free to comment below or to contact me about the questions. Have a nice day :)

Fruit Bowl Render

black and white fruit bowl

In our lighting and rendering class we are going through the basics of mental ray lighting with linear work flow. I’ve done a bit of this on my own as you might know if you keep up with this blog. I’m learning a lot about the different tools you have in Mental Ray to control shadows and blurry reflections. Our first assignment is to light and render a fruit bowl that as supplied to us. I’ve just started this assignment and I only have the orange texture started, but I have finished lighting the scene. We aren’t allowed to use any indirect lighting systems like Final Gather or Global Illumination. Any bounced light has to be simulated. I’m going to add coloured point lights to simulate bounced light after I have my textures setup.

Most of these lights are casting ray traced shadows with a light radius of 5, 40 shadow rays, and 2 bounces per ray. There is a bit of light linking going on so I can illuminate the bowl and drop cloth separately. For this coming Monday we have to have at least one of the fruits textures started. I have chosen to start with the orange. I generally like the texture, but I have to make a new bump map that puts all those little circular bumps across the surface. The current bump isn’t dense or varied enough.

(http://www NULL.terrymatthes NULL.com/wp-content/uploads/2011/09/lightrough1 NULL.jpg)
As always, if you have any questions about the settings or any of the file setup just post em here or email me.