« Posts tagged rig

[R&D] nHair Chain Strand Rig Part 2 of 2

This post is a continuation of my last post here (http://www NULL.terrymatthes NULL.com/maya/animation/maya-nhair-chain-strand-rig/). In the first post I explained that I was trying to create a strand of chain that was dynamic, but pinned at both ends like a strand of Christmas garland. At the time I wasn’t able to find any information on how to pin the loose end of the chain to an anchor pertaining to nHair. All tutorials I read/viewed were to do with the legacy hair system whose constraints don’t work on nHair curves. Well I’m here to report that I’ve found the solution I needed.

When working with nHair you need to make sure any objects you want it to interact with can also be seen by the nucleus solver. For my purposes this meant turning the polygon object representing my anchor at the end of my chain into a nMesh passive object. Once my polygon anchor was converted it could be used for a “component to component” nConstraint. I constrained the last CV in my dynamic hair curve to a vertex on my polygon anchor. Everything works great now and I can move either end of the rig around and it affects the chain as it should.

Time for bed *yawn*… well maybe a couple episodes of Full Metal Alchemist first. Damn you Netflix!


[R&D] nHair Chain Strand Rig Part 1 of 2

Rigging… It’s not my favorite aspect of 3D, but that’s probably because It’s also my least practiced. What better way to learn though than to jump right into nHair and IK Splines, right :D ? My end goal with this rig is to have several strands of chain that are strewn across a mirror ball attached at several points, think of garland on a Christmas tree if you need a visual. As always to start I researched how this could be accomplished in Maya. Every tutorial I read/watched mentioned IK splines and Maya’s hair system.

It took me the entire morning, but I was eventually able to produce a chain strand constrained on a single end. The biggest problem I ran into was constraining the far end of the chain to an object. Literally all the tutorials out there are using the old Maya hair System. With the copy of Maya I currently have (2014) you are forced into using Maya’s “nHair” system and the “n” stands for “Nucleus”. Nucleus if you’ve never heard of it is Maya’s new dynamic simulation system that unifies all your dynamic elements so they can operate in conjunction with each other. It’s Very similar to how Side Effect Software’s program Houdini works. So great, “yay”, everything works together, but all the constraints mentioned in the tutorials I watched are based on the old hair system and they do not work with nucleus hair. So this is as far as I have gotten today, and It will probably take another half day to find the proper type of constraint that acts in the same way a “stick” constraint does with legacy hair.

There are plenty of scripts out there that will do this task for you, but I try to avoid scripts when learning. I that find that; (A) it’s essentially letting someone else do the work for you which means you didn’t actually learn anything and (B) depending on how the script works, it could have unintended consequences immediately or down the road. For those of you who have never created anything like this before and are looking for answers here are the steps I used to create the rig and as always don’t be afraid to ask questions :)

  1. Model a chain link and then duplicate it over and over to create whatever length of strand you need.
  2. Use the joint tool to create a joint chain all the way down your strand putting a joint between each place where the pieces of chain meet up.
  3. One by one starting with the top chain link and the top joint use the rigid bind tool to bind each link to its corresponding joint. In the rigid bind options make sure you have the “Bind to: Selected joints” option activated.
  4. Draw an EP curve down the length of the chain adding a point over each of the joints you previously created. Press to “P” key to activate pivot snapping and your points will automatically center on the joints. Rename this curve something like “epc_original”.
  5. Make your curve a dynamic nHair curve through the nDynamics > nHair menu. You need to first make sure that the only option in the “Make Selected Curves Dynamic” option box that is selected is “Attach curves to selected surface”. This will now create a hair system and follicle system in your outliner.
  6. The last step is creating the IK spline and this is where most people make a mistake because they select the wrong curve. In the Animation > Skeleton menu select the option box for the “IK Spline Handle Tool”. Make sure the only option selected is “Root on curve”. With the tool active click in this order… the first joint of your joint chain then the last joint on your joint chain and now open your outliner and hold down ctrl(PC) or cmnd(Mac) and select the curve under the “hairSystem1OutputCurves” node. An IK node should now appear in your outliner.
  7. Lastly select the original curve and parent it to whatever piece of geometry you’d like to constrain the top of the chain to. Now if you use the interactive playback feature and drag that geometry around your chain will follow.

As soon as I figure out how to constrain the other end of the chain with nHair I’ll post an update, and if anyone figures it out before I do then please let me know. Bye for now :)


UPDATE!

Part 2 : The rig gets completed with moveable anchors at both ends. (http://www NULL.terrymatthes NULL.com/maya/animation/nhair-chain-strand-rig-part-2-of-2/)

[Game] Tombstone WIP 3 – Cloth

Maya Cloth Skeleton

Blowing Scarf (http://www NULL.terrymatthes NULL.com/wp-content/uploads/2012/12/tombscarf NULL.jpg)Since my last update I’ve added a cloth skeletal mesh to the scene. Cloth inside the Unreal Development Kit is something I’ve always wanted to take a look at.  After watching a quick tutorial over at 3D Buzz (http://www NULL.3dbuzz NULL.com/vbforum/sv_showvideo NULL.php?v=3830) I was ready to start setting up my cloth in Maya. The video is good, but it skips the entire rigging process and starts with a pre rigged 3D plane brought into the UDK. I looked around on the internet for some Maya specific tutorials, but there weren’t any. The first thing that caught me while working this out was the use of the term “bone“. A lot of the tutorials instruct  the reader to add two bones to the mesh. In Maya you don’t really lay down bones. You’re laying down “joints” and what I would consider the bones are the shapes Maya creates between those joints. Before you start you’re probably going to want to jump into Maya’s Animation tab so all the rigging tools are on your shelf. The first step in Maya is to place two joints in a chain along the X axis fairly close together. The next step after you’ve created these joints is to use a “smooth bind” to pair the joint chain with your mesh. That command is under the Animation Menu > Skin > Smooth Bind. Now with the joint chain bound to your mesh you can begin to “paint” your vertex weights. After being bound each joint in the chain stores a separate value for each vertex. Every individual vertex value lets the joint know how much influence it should have over that particular vertex. A value of 1 means the joint would act upon that vertex with 100% of it’s influence (or movement). A value of 0 means that the vertex will not follow that particular joint at all. Below I have a diagram showing how your joints should be setup and named. UDK will later ask us which bone we want associated with the cloth movement.Maya Cloth Skeleton (http://www NULL.terrymatthes NULL.com/wp-content/uploads/2012/12/bonesetup NULL.png)

Now that the mesh is rigged go into “Object Mode” and use the right click menu to access the “Paint Skin Weights Tool“. Make sure you have textures enabled in your viewport when you’re doing this. You also have to be in the “Default Quality Rendering” mode under your perspective views “Panel” menu to see the weights change as you paint. The first joint “bone1” is going to be associated with all the parts of your cloth mesh you don’t want to move. For my scenario I have painted all the vertices of the knot white and all the vertices of the two scarf arms black. I do this because I don’t want the knot to move at all.  I’ve included two diagrams below to show the weighting of my vertices to both bone1 and bone2.Bone one Weights (http://www NULL.terrymatthes NULL.com/wp-content/uploads/2012/12/bone1 NULL.png)Bone Two Weights (http://www NULL.terrymatthes NULL.com/wp-content/uploads/2012/12/bone2 NULL.png) After you’ve weighted your vertices you can export the mesh as a FBX for import into the UDK. On import the UDK should recognize your mesh as a skeletal mesh and give you a different window type when it’s opened up through the UDK Content Browser. After import there are a few properties you need to activate in your mesh.

First you need to open up your cloth mesh in the content browser. You should now have the AnimSet Editor open. This is because UDK is treating our cloth as a “Skeletal Mesh“. The first property we want to activate is “Force CPU skining” this will tell the UDK that we want our mesh to be treated as a cloth. It’s found under the “Skeletal Mesh” roll out in the “Properties” pane. The second and final property we need to change is under the “Cloth” roll out. When there expand the “Cloth Bones” roll out and hit the green cross to add an entry to the Cloth Bones list. Now click in the name space for that entry and call it whatever you named the second joint in Maya. In my case it was “bone2”. With this done you’re now ready to place your mesh into your game scene.Cloth UDK Mesh Properties (http://www NULL.terrymatthes NULL.com/wp-content/uploads/2012/12/Scarf NULL.png)

Make sure your mesh is selected in your content browser and then right click in one of your views so that you may add your mesh to the scene. Once your mesh is in the scene you need to change a couple of it’s properties that we couldn’t access from the AnimSet Editor window earlier. Under the “Skeletal Mesh Actor” roll out there is a sub section called “Cloth” expand this. Under here we can Cloth In Game Mesh Options (http://www NULL.terrymatthes NULL.com/wp-content/uploads/2012/12/Scarf2 NULL.png)see the first option “Enable Cloth” and a lower option called “Cloth Awake On Startup“. Enable both these options. As an optional step you can play around with the wind values to try and get your mesh to receive a constant blowing force. To now see your cloth in action you can rebuild your map and launch the level, or simply right click in the perspective viewport and chose “Play From Here“. Cloth doesn’t animate in the viewport’s “Game Mode“.

That’s it for this Tombstone project. I hope anyone following along found some cool tips to help them get a little more out of the UDK.

Cheers,

Terry Matthes

Flower Stem Rig

flower bent by dynamic hair deformation

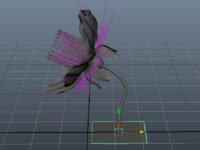
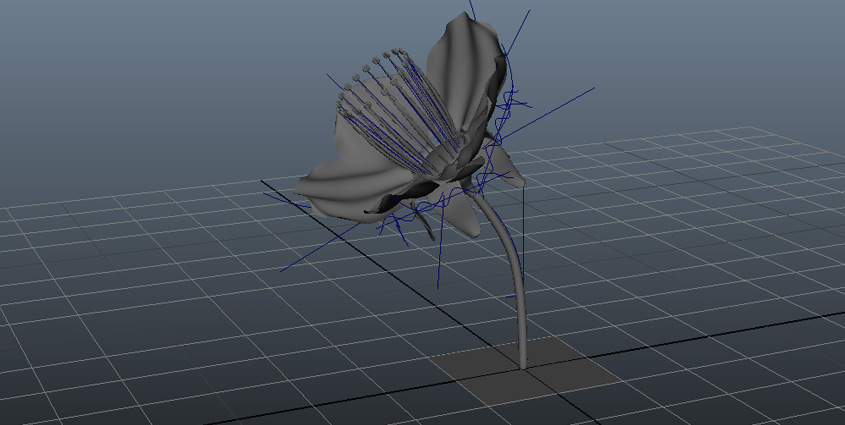
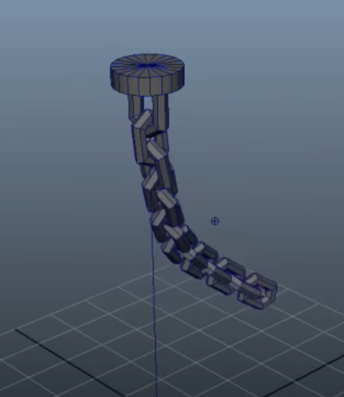
I had problems. I talked to people. I now have less problems. This is generally how I like my troubleshooting to go. The last problem I had with my project was getting the animation deformers at the top of the flower to follow the stem when I bent it. In newer versions of Maya (2011+) there is a constraint type “point on poly”. This worked quite well. I grouped the flower head along with all its deformers and then parented that group to the top center vertex of the stem’s poly cylinder. One problem down, about a dozen more to go. I don’t mind running into walls, not being able to climb them is a different story :P

grouped Deformers following vertex modified geometry (http://www NULL.terrymatthes NULL.com/wp-content/uploads/2011/07/stembend NULL.jpg)

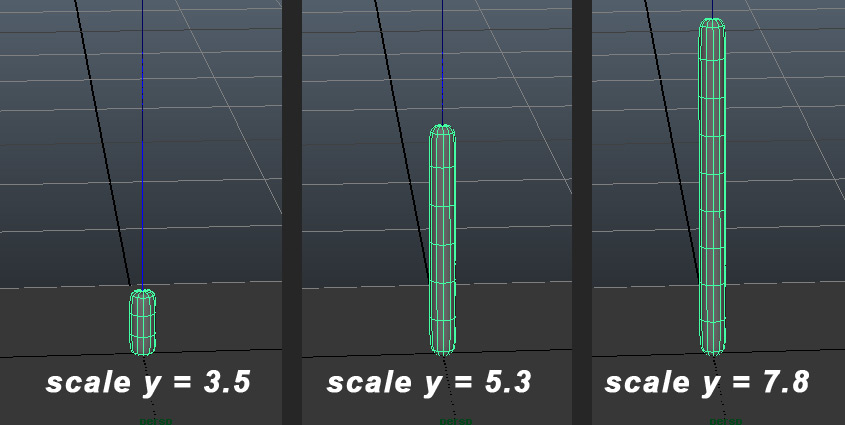
My next challenge was getting the stem to grow and take the flower head with it. There was a few different ways I could have approached this. While figuring this problem out I had to keep in mind that the stem might be bending and curving while growing. At first I thought I could just increase the scale of the stem, but as the stem got bigger and the bend modifier curve grew larger the mesh started to lose shape because it’s resolution was too low. A quick Google search came up with a video (http://vimeo NULL.com/7420996) on how to rig a vine by Jordan Blit. In this video Jordan hooks up a simple connection between the vine’s “Y scale” and a “poly split ring” node’s “divisions” attribute. This seems to be a terrific way to grow the stem and maintain its shape no matter the length. There are a few other things Jordan sets up to make this error-proof and you should definitely check it out. I should mention that your construction history must be kept intact for this to work. If you clear your history the connection to the “poly split ring” node will be broken. When finished I added a constant variable via Mathematic Nodes Mental Ray (http://www NULL.creativecrash NULL.com/maya/downloads/scripts-plugins/rendering/other-renderers/c/mathematic-nodes-mentalray-support---2) plugin that multiplies the divisions by 2. This gives us a higher resolution mesh. Terrific :D Our stem now grows and deforms to our bend modifier, plus we’ve given ourselves a “hook” to grab via our math constant to increase our mesh resolution. Now I need to set up our stem so it can be affected by dynamic forces.

flower stem's "y scale" relationship with the poly split ring" node (http://www NULL.terrymatthes NULL.com/wp-content/uploads/2011/07/stemscale NULL.jpg)

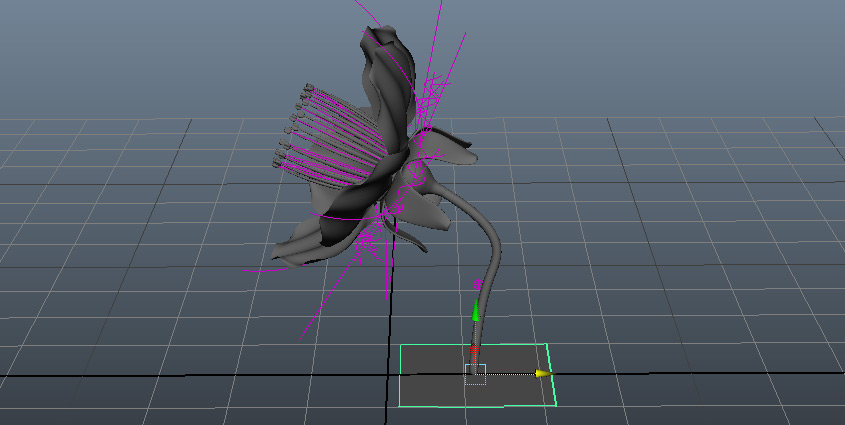
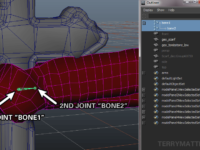
A friend and fellow 3D student mentioned rigging the stem up with a skeleton and using IK handles. He pointed me to this video (http://vimeo NULL.com/6044700) by Alex Villabon. In this video Alex gives a grass mesh a simple joint chain and then uses a Maya hair to deform the skeleton, which indirectly animates the mesh. I liked this method, but I didn’t want to use any joints in my flower rig. Keeping the rig “light” was important given the possible amount of flowers in my scene. Instead of controlling the stem indirectly with a joint chain I decided to make the hair directly control the stem by making the hair a “wire deformer’. A wire deformer is a curve which shapes the geometry it’s parented to. You can alter your curve and watch the geometry conform to its shape. This works out well because the hair is inherently affected by dynamics and it will control the shape of our stem. Now that the stem is set up correctly I have to start on the animation for the flower head. It has to transition from a bud into a fully bloomed flower.

flower bent by dynamic hair deformation (http://www NULL.terrymatthes NULL.com/wp-content/uploads/2011/07/flowerhair NULL.jpg)

At this point I still don’t know whether I want to use blend shapes or modifiers to animate the bud opening. I’m thinking blend shapes might be overkill as the bud is really just a sphere with 5 sections that peel back to let the flowers petals grow out. What do you guys think? In case anyone is interested I have started a thread (http://forums NULL.cgsociety NULL.org/showthread NULL.php?f=88&t=989384) regarding this project over at CG Society (http://www NULL.cgsociety NULL.org/).

Here are links to the videos and plug-ins I mentioned throughout the post.

Alex Villabon
Animate Joints With Maya Hair (http://vimeo NULL.com/6044700)

Jordan Blit
Growing Vine Rig (http://vimeo NULL.com/7420996)

Creative Crash
Mathematic Nodes Mental Ray (http://www NULL.creativecrash NULL.com/maya/downloads/scripts-plugins/rendering/other-renderers/c/mathematic-nodes-mentalray-support---2)