Introduction
Prerequisites
None.
Creating seamless textures is an important skill if you want to make your textures cover a large area and tile. Luckily for you the process is actually quite simple. From within Photoshop we’ll look at the Offset function and how to create custom brushes that are unique to the texture we’re working on. Well also be using the tried and true method of clone stamp to get rid of the seams the Offset filter creates.
Photoshop
Document Setup
When creating any texture you want to make sure you’re keeping it square. The dimensions should be the resultant of 2 to any power. That is: 2, 4, 8, 16, 32, 64, 128, 256, 512, 1024, 2048 or 4096.
You also want to make sure your file’s DPI setting is set to 72. The only time you ever want to change the DPI is when you are producing something for print, in which case it would be set to 300. Everything else can be left alone.
 (http://www NULL.terrymatthes NULL.com/wp-content/uploads/2010/12/m_101_seamless_split NULL.jpg)Prepping Texture For Tiling
When creating any texture that will be tiled you want to make sure that there are no obvious patterns. Take a look at your texture and see if there are any spots that really stand out above the rest. These will give away the pattern as you will be able to spot their repetition. Our entire texture should have a uniform level of detail and colour. That’s not to say the whole texture has to be bland, just make sure that no one part grabs your eye’s attention more than another. Something else you need to watch out for are highlights and shadows. If there are any shadows that are to dark you can lighten them up with the Dodge tool (alt+shift+d). Alternatively you can darken highlights with the Burn tool (alt+shift+b). The texture I wanted was also a fair bit darker so I went ahead and adjusted the over all brightness of the texture as well. Once you’ve removed all outstanding detail from your texture we’ll look at how to create some custom brushes that will let us add less obvious repetitive detail.
 (http://www NULL.terrymatthes NULL.com/wp-content/uploads/2010/12/m_101_seamless_selection NULL.jpg)Custom Brush Creation
We are creating custom brushes because we want our cloning process to look as natural as possible. These brushes will be made from features in our texture and will help to hide seams that offsetting the texture will create. Our first step is to grab our Magic Wand tool and use it to select a part of our texture. The selection chosen will be the base for our brush. The selection size is up to you as is what you select. Try to keep the selection smaller so that if used a few times over the detail it creates won’t pattern too much. If you find your selection is too large or too small you can change the “Tolerance” in the tool settings atop Photoshop. The higher the tolerance the more the tool will select. Make a selection you are happy with and choose your Selection Tool (“v” key) from the tool menu. Now navigate to Edit > “Define Brush Preset”, select it, and give your brush a name. There you go, you can now make your own brushes. Feel free to make a few different custom brushes for your texture. The more you have the less obvious the tiling will be :)
 (http://www NULL.terrymatthes NULL.com/wp-content/uploads/2010/12/m_101_seamless_offset NULL.jpg)Offset
We want to use the Offset filter to align the border edges of our texture. The only downside to using offset is that it leaves 2 major seams that cross our texture at the center. You can see this in the picture to the left. The Offset filter can be found under the Filter>Other menu. When you use the Offset filter you’ll want to change two options. The Vertical and horizontal sliders let you choose their respective pixel distances. We want to set both of these to half the pixel width of our texture. For a square 512px texture that means setting them both to 256. Go ahead and apply the Offset filter to our texture layer. We’re almost done now, but what can we do about these seams?
 (http://www NULL.terrymatthes NULL.com/wp-content/uploads/2010/12/m_101_seamless_stamped NULL.jpg)Clone Stamp
Your texture is Offset now, but we have to get rid of those seams. Let’s start by selecting the Clone Stamp (“s” key) and then picking the custom brush we created from the Brush Menu(“F5” key). Hover over a section of your texture holding down the alt key and then click to set that area as your cloning source. Now you will be able to click anywhere on the canvas and stamp down a section of that image in the shape of your custom brush. Do this to cover all the seams in your texture. Try to do this just as much as you need and don’t stamp over the image edges except where the seams cross the edge. You should also be choosing different clone sources as you go along so you don’t clone the same area over and over.
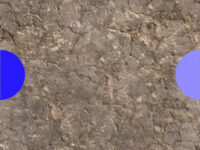
 (http://www NULL.terrymatthes NULL.com/wp-content/uploads/2010/12/m_101_seamless_marquee NULL.jpg)Our last step in removing seams is to copy the pixels from the four points where the seams crossed the edges of our document. We want these points to be mirror copies of each other. To do this we’re going to make a semi circular selection at the top, Copy (ctrl+c) the pixels, Paste (ctrl+v) them on a New Layer (ctrl+shift+n), flip them vertically (Edit > Transform > “Flip Vertical”) and move them down to the bottom edge. The same will be done mirroring the left edge’s pixels to the right, but we will flip the pixels horizontally. Once this is done use the Eraser (“e” key) with your custom brush shape to blend the edge of the pasted layers into your base texture. When that is done make sure your layer with the brush pattern is hidden and Merge Visible Layers (ctrl+e) to get a single layer. If you’re a little foggy on the process check out the diagram to our left. We are simply copying pixels from the darker hues, flipping them, and putting them in the place of thier respective lighter hues.
 (http://www NULL.terrymatthes NULL.com/wp-content/uploads/2010/12/m_101_seamless_final NULL.jpg)Defining a Pattern
To Test out our texture. We will turn it into a pattern and then fill a new larger file with our custom pattern. To create our pattern we will Select All (ctrl+a), make sure our Select Tool (“v” key) is active, and go the the Edit menu and select “Define Pattern”. Give your pattern a name and create a new document that is at least twice the size of your current canvas. In your new file create a New Layer (ctrl+shift+n) and go to the Edit menu again and hit “Fill”. In the dialogue box that appears under the “Use” rollout select “Pattern”, choose your pattern, and then click “OK”. Your document should be tiled with your custom texture like our example above. Take a moment to view this and make sure you can’t spot any seams. If you spot any go back and fix them; look close. If there are none you’re done and have added a new skill to your toolset :D
Conclusion
If you’re new to creating seamless textures this tutorial might have been a lot to take in, but that’s OK. Go over it again, send me questions, post a query. I don’t mind lending a hand if you need some help. You will get good at this; trust me.
Further Reading
Hourences – Texture Tricks (http://www NULL.hourences NULL.com/tutorials-texture-tricks)
Program Shortcuts Used
Photoshop
Marquee Selection Tool (“m” key)
Burn Tool (alt+shift+b)
Dodge Tool (alt+shift+d)
Deselect (ctrl+shift+d)
Clone Stamp (“s” key)
Paste (ctrl+v)
Copy(ctrl+c)
Select Tool (“v” key)
Select All (ctrl+a)
New Layer (ctrl+shift+n)
Merge Visible Layers (ctrl+e)
Contextual Menu (“F5” key)

 (http://www NULL.terrymatthes NULL.com/wp-content/uploads/2018/08/CGChallengeOne NULL.jpg)
 (http://www NULL.terrymatthes NULL.com/wp-content/uploads/2018/09/fruitcollage NULL.jpg)
 (http://www NULL.terrymatthes NULL.com/wp-content/uploads/2018/09/fruituvs NULL.jpg)
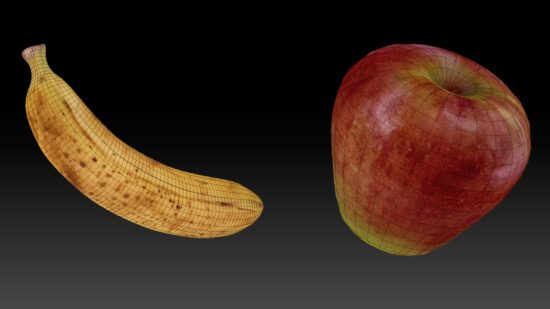 (http://www NULL.terrymatthes NULL.com/wp-content/uploads/2018/09/fruitZbrush NULL.jpg)
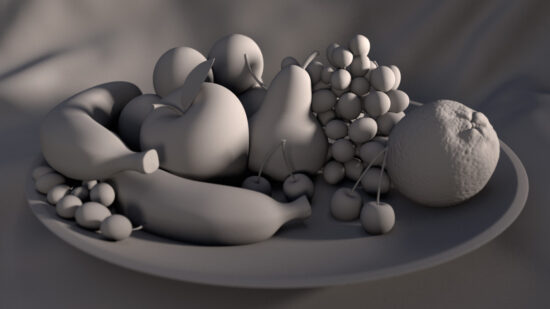 (http://www NULL.terrymatthes NULL.com/wp-content/uploads/2018/09/lightingFruit NULL.jpg)