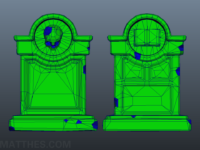
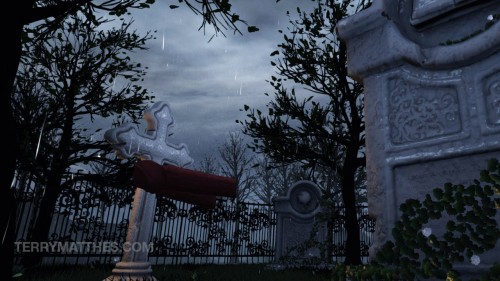
I’m creating a cemetery scene so you can imagine that I’m going to need some tombstones. I have sculpted another since my last WIP and thought I would share it. As I was breaking down the scene I was trying to think of ways I could maximize my work time. I wanted to make sure I wasn’t sculpting more assets than I needed to make the scene look full. From that point on I decided that all the tombstones were going to have a different design on each side. This would let me cut the number of tombstones that needed to be created in half.
Just like the last mesh I started in ZBrush my sculpting the general shape. With hard objects like this I like to start by smashing together basic geometric shapes with Dynamesh. After I have the basic shape it’s time to save a copy and start sculpting wear and tear. I was able to use the noise profile that I saved from my last sculpt to break up the noise on this one as well. Saving out the noise and other commonly used elements will also help me to keep things artistically cohesive throughout the production of the scene.
 (http://www NULL.terrymatthes NULL.com/wp-content/uploads/2013/01/gravesculptL NULL.jpg)
Dynamesh is your best friend in ZBrush while creating game assets! Maybe it’s because I started working with 3D before ZBrush was around, but I just love the ability to kit bash with ZBrush while staying largely ignorant of topology. Gone are the days of matching up verts and integrating meshes before they can be treated as a single surface. With the tombstone here I was able to take a human skull I had modeled for a previous project and insert it into the top of the grave. The book sculpted the same way, but I created the book within ZBrush as a separate subtool. If you’ve never merged dynamesh objects before it’s actually quite simple. Start by making sure both objects are dynameshes themselves and then use subtool master to merge all visible subtools. They aren’t quite the same yet though. They should be one sub tool, but you’re going to have to ctrl drag and empty marquee selection to have ZBrush retopologize your dynamesh subtool once more. Bam! It should be all one surface now. If the objects look to crude then you need to turn up your dynamesh resolution before dragging to retopologize.
Like most of the assets in the scene I’m trying to keep the poly count around 1K. And speaking of polygons I wanted to address a common misconception about them. A lot of people fret about poly count in-game design. Whether its triangles or quads less is not always better. We’ve gotten to the point on mid level hardware where poly count isn’t the limiting factor it used to be. “I spent a solid few months of optimizing polys, lightmap UV channels, collision meshs for everything in UT and the act of stripping 2million polys out of a level generally improved the FPS by 2 or 3 frames.” – Kevin Johnstone (http://www NULL.polycount NULL.com/forum/showthread NULL.php?t=50588). Texture maps represent modern geometry more than polygons do at levels of high frequency detail. We are using lots of texture memory to affect and displace geometry. Stripping down the polygons to an absolute minimum is going to cripple the ability of a normal/displacement map to affect the perceived detail of your asset. If you need a few more verts to make an edge look better just do it!
If textures are the new limiting factor then what you should be aware of is “draw calls“. Your video card can only do so many of these per rendered frame and keeping this low is going to have a big impact on performance. A draw call is done for each material on a mesh every frame. One mesh doesn’t equal one draw call. A lot of engines will actually limit the number of materials you can put on a single mesh. The 600 series Nvidia cards can do roughly 600 draw calls per frame and that’s pretty good. When you think about how many textures that is you might that’s a lot, but each of those calls is slowing down performance. One last thing worth mentioning is that even instanced meshes with the exact same materials will require separate draw calls. This means that if you have a metropolitan city full of instanced buildings each individual building is adding another draw call. If you have more than one material on heavily instanced assets you can see how this would start to adversely affect your frame rates. Just try and keep the number of materials on each mesh as low as possible :)
Just like our last tombstone mesh I broke out the damaged bits and strong surface changes into their own “UV Islands”. These islands are keeping xNormal from casting seams along the edges of those areas. The key is to break out UVs where the geometry sharply differs from the continuity of the surface around it. In the following diagram I’ve outlined the UV islands in blue on both the mesh and UV editor. You can see how these areas differ from the geometry surrounding them. Doing this with your light map UVs as well as your texture UVs will help shadow fall across your object with less error.
 (http://www NULL.terrymatthes NULL.com/wp-content/uploads/2013/01/GraveUVL NULL.png)
During the initial baking of normals I produced two errors outlined in below. These particular errors were not from UV mapping, but from floating vertices that weren’t connected with an edge. Retopologizing in ZBrush is awesome, but now without its downside. I find the vertices you lay down quite hard to see and the cursor snapping can give you errors if you’re backed to far out by not connecting your edges. On closer inspection of the erroneous areas I was able to find the floating geometry and correct it. Now you can see how this got rid of those errors on the updated normal map texture. Always inspect your errors thoroughly. Chances are your error is coming from errant geometry at the site or flipped normals. If your normal map comes out looking like details are being projected on from the front to the back or vise versa you’re having scale issues. Your models scale is too small for xNormal to properly bake the texture map. The UDK’s native scale in Maya is too small so you’re going to have to scale up your geometry 20-50 times its actual size to get proper normal map bakes.
 (http://www NULL.terrymatthes NULL.com/wp-content/uploads/2013/01/UVerrorL NULL.jpg)
The job I’m working has the potential for me to work on some “magic” type effects so I am going to post a couple R&D clips this weekend. These will be geared more towards film although I will try to explain the fundamentals well enough so that you may apply it to Cascade in the UDK. If your still feeling confused about baking normals? Check out Tombstone WIP2 (http://www NULL.terrymatthes NULL.com/unreal-2/materials/tombstone-wip-2/) to learn more about game asset creation with the UDK in mind. Until then Cheers,
Terry

 (http://www NULL.terrymatthes NULL.com/wp-content/uploads/2014/04/combatCrossWIP1_001 NULL.jpg)
 (http://www NULL.terrymatthes NULL.com/wp-content/uploads/2014/04/terrancematthes_artsub NULL.jpg)
 (http://www

 (http://www
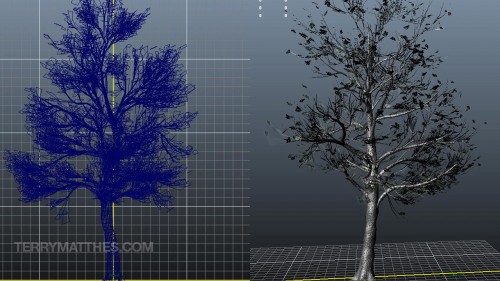 (http://www
 (http://www
 (http://www
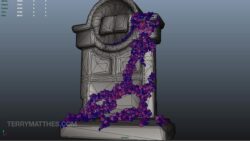 (http://www
 (http://www
 (http://www
 (http://www
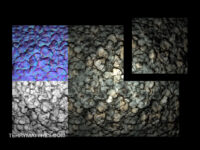
 (http://www
 (http://www
 (http://www
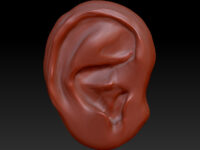
 (http://www
 (http://www
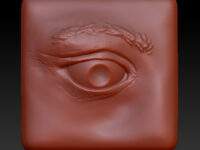
 (http://www