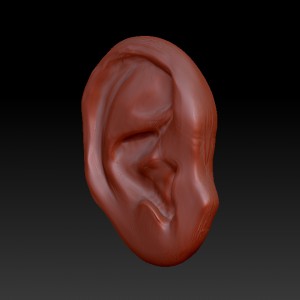
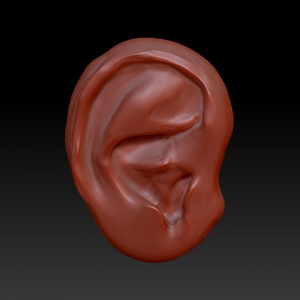
 (http://www NULL.terrymatthes NULL.com/wp-content/uploads/2012/01/ear1 NULL.jpg)I find the ear pretty tricky to model in a standard program like Maya, but in ZBrush.. wow. It’s so much easier. Being able to just push into a surface makes all the contour changes in the ear less scary. In Maya you’re playing with curves and nurbs, or trying to match up all sorts of curvy edge verticies. I would say that the ear is definitely the most challenging part of the whole body to model. For the base of this sketch I used a standard ZBrush cube, and modeled with symmetry on. Shaping the ear was done with the move brush. I pulled out the outline of the ear first.
 (http://www NULL.terrymatthes NULL.com/wp-content/uploads/2012/01/ear2 NULL.jpg) Next I took the rake brush and built up all the major curves in the ear on the flat surface.
The curves along the ear acted as a guidline for where to change the depth of the ear. They each surround a kind of pocket that is either sunken into the ear or elevated. Now that the general shape was there I just worked it with the rake tool for a few more minutes then cleaned the surface up with the polish and smooth brushes. If I had more time I would have liked to have curved the ear profile. I should mention there is poling on the ears edge because of the ZBrush cube I used. I didn’t make an adaptive skin and because of this I was left with tris on the top and bottom of the cube during the sculpt.
Comments (0)